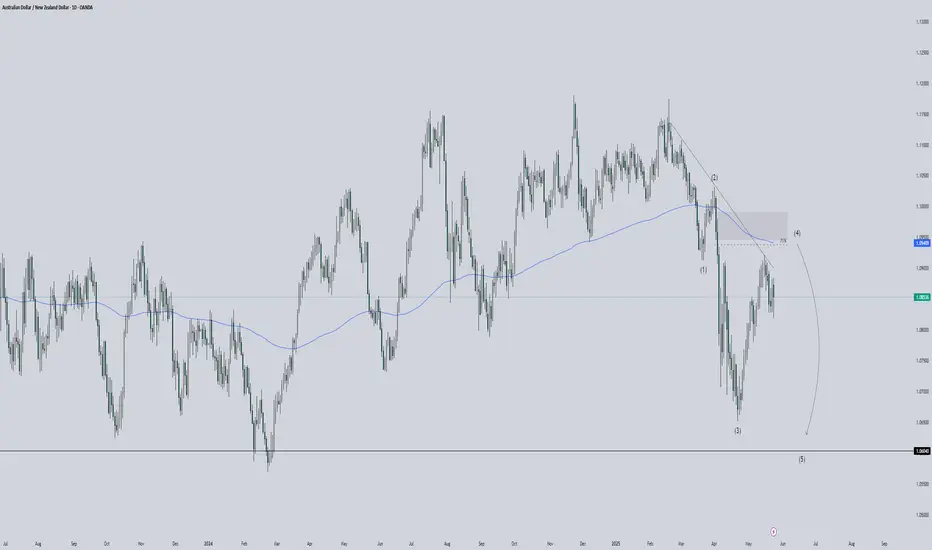
📉 AUD/NZD Daily Breakdown – Wave 5 Incoming?
We’ve got a textbook Elliott Wave setup unfolding:
Wave (1), (2), and (3) complete — with strong momentum confirming Wave (3).
Current price reacting from the 71% Fibonacci retracement, perfectly aligned with a supply zone and the 200 EMA.
Price rejection at this zone suggests Wave (4) may be complete.
🚨 Bearish confluence stacking:
Trendline resistance holds.
Price respecting the EMA as dynamic resistance.
Clear supply zone + fib rejection = high-probability short setup.
🎯 Wave (5) target: 1.06040
This could be the final leg down — traders, get your eyes on this!
Disclaimer
The information and publications are not meant to be, and do not constitute, financial, investment, trading, or other types of advice or recommendations supplied or endorsed by TradingView. Read more in the Terms of Use.
Disclaimer
The information and publications are not meant to be, and do not constitute, financial, investment, trading, or other types of advice or recommendations supplied or endorsed by TradingView. Read more in the Terms of Use.