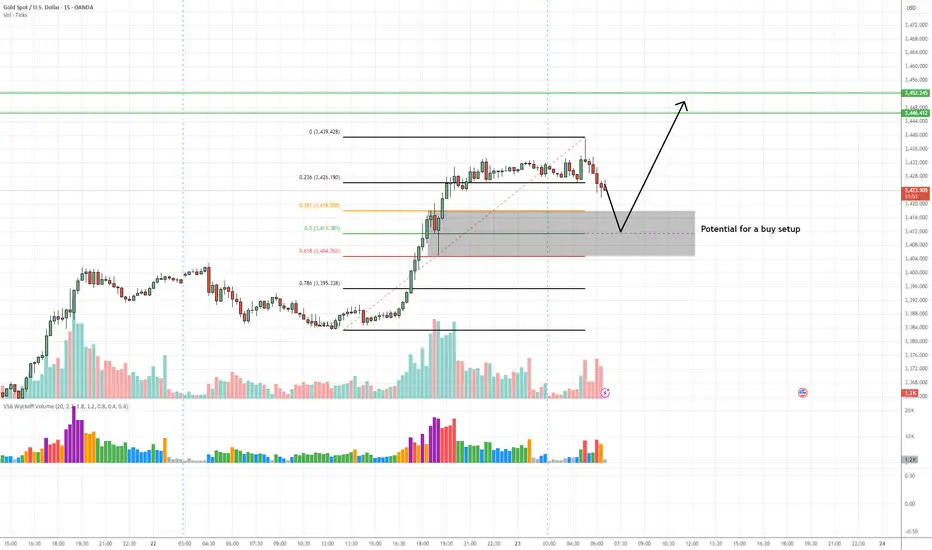
✅ Entry Zone: 3,411 – 3,404 (Key demand zone + 50%-61.8% Fib retracement)
🎯 Take Profit 1 (TP1): 3,446 (previous swing high)
🎯 Take Profit 2 (TP2): 3,452 (extension target above resistance)
🛑 Stop Loss (SL): Below 3,404 (beneath demand zone to avoid false breaks)
📊 Technical Insight:
Climactic volume seen on the initial rally signals strong professional interest in the move upward.
As price retraces, volume has decreased significantly, indicating lack of aggressive selling pressure (No Supply).
The shaded demand zone aligns perfectly with the 50%–61.8% Fibonacci retracement, suggesting a high-probability area for Smart Money accumulation.
Look for a Test Bar or Spring within this zone on low volume as confirmation of supply exhaustion.
If price confirms with a wide spread up-bar on increased volume from the zone, this will signal the beginning of a markup phase, in line with VSA principles.
📍 Bias: Bullish as long as price respects the demand zone. Aggressive traders can scale in near the demand area; conservative traders should wait for confirmation of demand dominance before entering.
Trade active
Disclaimer
The information and publications are not meant to be, and do not constitute, financial, investment, trading, or other types of advice or recommendations supplied or endorsed by TradingView. Read more in the Terms of Use.
Disclaimer
The information and publications are not meant to be, and do not constitute, financial, investment, trading, or other types of advice or recommendations supplied or endorsed by TradingView. Read more in the Terms of Use.