reversalthis is a simple ema indicator. i specifically set my fast ema to 4 and my slow ema to 13. i only turn on signals after 9;30 am and wait for the ema cross signal to fire once a swing point has been sweeped. i follow the daily. If the daily high has been sweep the previous day and or closed then we are taking highs therefor bullish bias. vice versa for sells. if bullish then only take bullish 4/13 ema cross.THIS CROSS IS MY SIGNAL THAT THERE IS A POTENTIAL CHANGE OF ORDERFLOW, YOU MUST VERIFY THAT THERE IS INDEED A BREAKER BLOCK BEFORE ENTERING. i dont actually just follow a simple ema cross. it means something.
Candlestick analysis

Pro Scalping Strategy [1Min | No Repaint | High Precision]Pro Scalping Strategy
Dual-Mode Precision Scalping System | EMA Trend + RSI + ATR | Non-Repainting
🔍 Overview
This indicator is a precision-engineered scalping tool optimized for lower timeframes (1–5 min), offering stable Buy/Sell signals without repainting.
Built on a robust trend-following framework, this system gives you the choice of two operating modes:
🔒 High Accuracy: Strict filters, fewer but stronger signals
⚡ More Signals: Looser filters, more frequent entries
🧠 How It Works
The logic is based on a multi-filter engine applied on closed candles only, ensuring non-repainting, clean, and confirmed entries.
⚙️ Technical Filters Used
1. EMA Trend Stack
Defines market trend using 3 EMAs (9, 21, 50)
Buy: EMA9 > EMA21 > EMA50
Sell: EMA9 < EMA21 < EMA50
2. EMA Crossover Filter
A confirmed crossover or crossunder is required from 2 candles back
Ensures trend momentum is validated before signal appears
3. EMA Slope Filter
Only accepts signals if mid EMA (EMA21) is sloping in trend direction
4. RSI Filter
Filters out signals when RSI is too extreme
RSI < overbought for Buy / RSI > oversold for Sell
5. ATR Filter
Confirms market has enough volatility
ATR must exceed a minimum threshold
✅ Modes Comparison
Feature High Accuracy Mode More Signals Mode
Min EMA Gap 0.1 0.05
Min ATR 0.2 0.1
RSI Range 30–70 25–75
Entry Frequency Lower Higher
Signal Quality Tighter + Stronger Looser + Flexible
🔔 Features
🔁 No repaint logic
⚙️ Adjustable settings with simple mode switch
⚡ Real-time alerts via alertcondition()
✅ Visual confirmation with BUY/SELL labels
💹 Suitable for scalping crypto, forex, gold, indices, and more
📌 Author: ALIP FX
“Success Elevated, Trade Smarter.”


WaveTrend Strategy It is the wave trend indicator transformed into a strategy with Zapay intelligence. Buys on yellow candles and sells on turquoise candles. Opens both long and short trades. All parameters can be adjusted. Set the parameter according to the chart minute and test.

Open Range Breakout (ORB) with Alerts
🚀 ChartsAlgo – Open Range Breakout (ORB) with Alerts
The Open Range Breakout (ORB) Indicator by ChartsAlg is designed for intraday traders looking to capitalize on price movements after the market’s opening range. This tool is especially effective for futures (MNQ, MES) and high-volatility stocks or crypto where initial volatility sets the tone for the session.
This indicator identifies a user-defined opening range window, plots the high/low lines of that range, and visually alerts users when price breaks out above or below the range — with options to customize breakout repetitions, background fill, and alerts.
💡 What is an Open Range Breakout (ORB)?
The opening range represents the high and low established during the first few minutes of the trading session — usually 15 or 30 minutes. Many intraday strategies are based on the idea that breaking out of this initial range often signals strong momentum and trend continuation.
Traders often enter:
Long when price breaks above the range high.
Short when price breaks below the range low.
⚙️ How It Works
You define a session window (e.g., 09:30–09:45 EST).
The indicator tracks the high and low during this time.
Once the session ends, the high and low become your range breakout levels.
The indicator then:
Plots lines for visual clarity
Optionally fills background between the range
Triggers breakout signals if price crosses the levels
Provides alerts when breakouts occur
🛠️ Settings Breakdown
🔹 Session Settings
Range Session: Set your preferred window (e.g., 0930–0945). Can be premarket, first 30 mins, or any custom time.
Time zone: Use "America/New York" for EST (default) or change to "GMT+0" for international traders.
🔹 Breakout Settings
Bullish Breakout Signals: Number of allowed breakout alerts above the range.
Bearish Breakout Signals: Number of allowed breakout alerts below the range.
This prevents repeated alerts once breakout has been confirmed.
🔹 Display Settings
Show Background Fill: Fills area between high/low of the range for easier visual analysis.
Show Breakout Signals: Triangle markers plotted on the chart when breakouts happen.
Only Show Today’s Range: Keeps the chart clean by showing only the most current day’s range.
🔹 Color Settings
Range High/Low Line Colors: Choose any color for clarity.
Range Fill Color: Customize the highlight area for your chart style.
📊 Chart Features
Range High/Low Lines: Automatically plotted after range session ends.
Visual Fill Box: Optional background shading between the opening range.
Triangle Breakout Markers: Appear at the breakout candle.
Alerts: Can be used with TradingView’s alert system to notify you of breakouts in real-time.
🔔 Alerts
Two alert conditions are built in:
Bullish Breakout: Triggers when price breaks above the high of the range.
Bearish Breakout: Triggers when price breaks below the low of the range.
Example Alert Message:
📈 “Bullish Breakout above Open Range on AAPL!”
To activate:
Click “🔔 Alerts” on TradingView.
Set condition to this script.
Choose “ORB Breakout Up” or “ORB Breakout Down”.
Choose alert frequency and notification method.
⚠️ DISCLAIMER
ChartsAlgo tools are for informational and educational purposes only.
They are not financial advice or signals. Past performance does not guarantee future results. Use at your own risk and always implement solid risk management.
By using this indicator, you agree that you are solely responsible for any trades or decisions made based on the information provided.

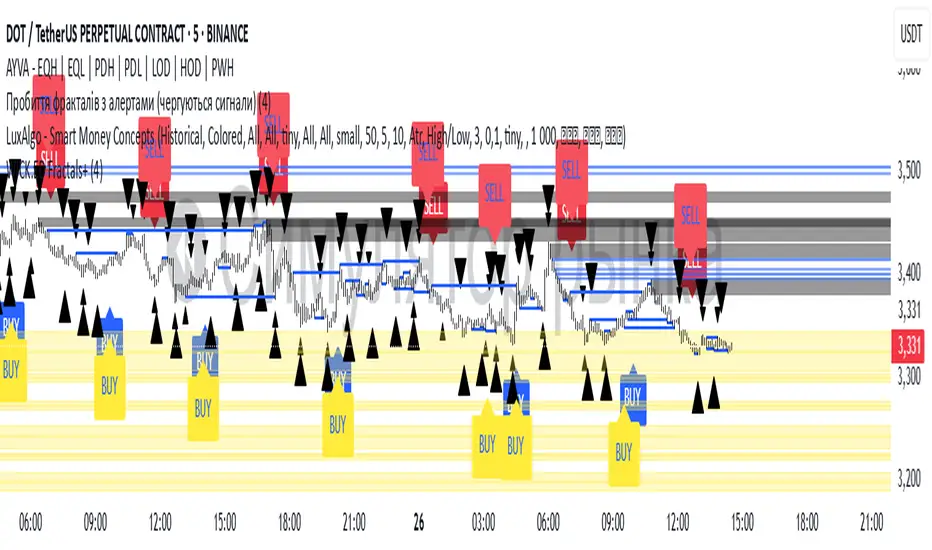
Williams Fractals with Buy/Sell Signals🧠 Concept:
This indicator is based on the concept of fractal swing highs and lows, commonly used in Bill Williams’ trading methods. A fractal forms when a candle’s high or low is higher/lower than a set number of candles on both sides. This structure helps identify local market turning points.
⚙️ Inputs:
Fractal Sensitivity (swingSensitivity):
Number of candles required on each side of the central bar to validate a fractal.
For example, if set to 2, a swing high is detected when a bar’s high is higher than the previous 2 bars and the next 2 bars.
✅ Features:
Fractal Detection:
Plots white triangles above swing highs (down fractals).
Plots white triangles below swing lows (up fractals).
Buy/Sell Signals:
Buy Signal: Triggered when the candle closes above the most recent down fractal.
Sell Signal: Triggered when the candle closes below the most recent up fractal.
Signals alternate — a Buy must follow a Sell and vice versa to reduce noise.
Signal Labels:
"BUY" label appears below the candle in green.
"SELL" label appears above the candle in red.
Alerts:
Real-time alerts are available for both Buy and Sell signals via alertcondition().
📌 Use Case:
This indicator can help you:
Detect short-term reversals.
Confirm breakouts or structure shifts.
Time entries with clear logic based on price action.
Bar ColorThis script implements a designed to [purpose – e.g., identify trend direction, generate trade signals, highlight overbought/oversold conditions
This script is based on , and is fully customizable with adjustable parameters.
Use it on any asset and timeframe. Best paired with .

MOETION TRADNTM Bot Alpha – ICT x BOEOSMasters of Exchange TM _ ICT & EMA indicator
this is for moetion trading mentors
created by moewavi and samoedefi

Optimized Bayesian Network Signal (Tunable)Built for short set-up in the NY Session. it uses a bayesian network with adjustable candlestick look-back period.
MACD
RSI
Volume sensitivity settings.

MOETION TRADNTM Bot Alpha – ICT x BOEOSMasters of Exchange TM - LuxAlgo inspired trading indicator
Built completely by SamoeDefi
One of many,,, stay tuned.
EMA BREAKS BOS BREAKS OB BREAKS ICT CONCEPT with volume displacement scalps and reads

Opening Candle Indicator V5Details of this release:
1. Add an alert with two conditions:
- Price breaks the highest candlestick opening and closing above it.
- Price breaks the VWAP indicator value.
2. Integrate the VWAP indicator and the 200 EMA with the main indicator.
3. Display buy and sell signals based on specific conditions related to the VWAP breakout.
4. Increase target lines to five.
5. Most importantly, I added custom windows in the settings to apply the indicator to other markets based on adding the opening and closing times for any market with a daily opening and closing time.
Important note: The second buy signal, which comes after a sell signal appears, is based on two conditions: a close above the high of the previous sell signal and a close above VWAP
Warning - Buy or sell signals are only warning signals and the user is responsible for evaluating and studying this signal.
------------------------------
Same features as version 4 with some bug fixes.
------------------------------
تفاصيل هذا الإصدار:
1-أضفت تنبيه يحتوي على شرطين
-إختراق السعر الأعلى لشمعة الإفتتاح والإغلاق فوقها.
-إختراق السعر لقيمة مؤشر vwap.
2-دمج مؤشر vwap والمتوسط الأسي 200 مع المؤشرالرئيسي
3- إظهار إشارات الشراء والبيع بشروط معينة مرتبطة بإختراق vwap
4-زيادة خطوط الأهداف إلى خمس.
5- وهي الأهم أضفت نوافذ مخصصة في الاعدادت لتطبيق المؤشر على الأسواق الأخرى بناء على إضافة وقت الإفتتاح والإغلاق لأي سوق له وقت إفتتاح ووقت إغلاق يومي.
ملاحظة مهمة:إشارة الشراء الثانية والتي تأتي بعد ظهور إشارة بيع وضعت بناء على شرطين وهما الاغلاق فوق الاعلى لإشارة البيع السابقة والاغلاق فوق مؤشر VWAP
تحذير-إشارات الشراء أو البيع ليست إلا إشارات تحذيرية والمستخدم هو المسئول عن تقييم ودراسة هذه الإشارة
-----------------------------------------------------------
نفس مميزات النسخة الرابعة مع إصلاح بعض الأخطاء
----------------------------------------------------------

Bullish & Bearish Reversal Scanner_KSPBullish & Bearish Reversal Scanner_KSP
Bullish & Bearish Reversal Scanner_KSP
Bullish & Bearish Reversal Scanner_KSP


EMA 9 vs EMA 150 Cross Indicator//@version=5
indicator("EMA 9 vs EMA 150 Cross Indicator", overlay=true)
// Input EMAs
shortEmaLen = input.int(9, title="Short EMA (Fast)")
longEmaLen = input.int(150, title="Long EMA (Slow)")
// Calculate EMAs
emaShort = ta.ema(close, shortEmaLen)
emaLong = ta.ema(close, longEmaLen)
// Detect Crosses
bullishCross = ta.crossover(emaShort, emaLong)
bearishCross = ta.crossunder(emaShort, emaLong)
// Plot EMAs
plot(emaShort, title="EMA 9", color=color.gray)
emaColor = emaShort > emaLong ? color.green : color.red
plot(emaLong, title="EMA 150", color=emaColor, linewidth=2)
// Plot Arrows
plotshape(bullishCross, title="Buy Signal", location=location.belowbar, color=color.green, style=shape.arrowup, size=size.small)
plotshape(bearishCross, title="Sell Signal", location=location.abovebar, color=color.red, style=shape.arrowdown, size=size.small)

X HL QA market structure tool designed to frame price action within a defined context of prior session dynamics. It accomplishes this by anchoring a set of reference levels to the high, low, and open prices of a user-specified higher timeframe (e.g., 4H, 1D, etc.) and projecting those levels onto the current chart for ongoing analysis.
At its core, the indicator establishes a reference range—derived from the previous completed instance of the selected timeframe—and overlays this on the current timeframe. This range serves as a foundational structure for price interpretation in the current session.
Building upon this framework, the script constructs a set of symmetrical quadrants (or deviation zones) both inside and outside of the prior range. These include:
The midpoint (EQ) of the prior range
Levels at ±0.25x, ±0.75x, ±1.0x, ±1.5x, and ±2.0x the range height
These levels act as contextual zones that traders can use to interpret price behavior—whether it's consolidating within the prior range, approaching fair value (EQ), or expanding into directional continuation or reversal zones beyond the range.
The script operates in both real-time and historical contexts. On live bars, it dynamically updates the key levels to provide an evolving view of current price positioning. Simultaneously, it supports the display of historical levels for past sessions, enabling robust backtesting and comparative analysis of price behavior relative to previous quadrant structures.
Ultimately, this tool serves as a positional map, helping traders assess where price is trading relative to significant levels from the prior session, offering insights into potential support/resistance, overextension, or mean reversion scenarios.
Key Technical Features
Multi-Timeframe Support:
request.security() is used to pull data from a user-defined higher timeframe regardless of the current chart interval.
Visual Flexibility:
Toggle between "line" and "channel" mode.
Line color, width, and visibility are all user-controlled.
Anchoring Options:
Deviation levels can be calculated from either the previous period's open or its EQ (midpoint), giving flexibility depending on analytical preference.
Efficient Labeling:
Labels are only rendered on the last bar and are automatically cleared and redrawn to prevent duplication.
Label style, size, text color, and background color are all user-configurable.
Trading Application
This indicator is especially suited for:
1. Mean Reversion Strategies
When price moves beyond +1.0 or +1.5 deviations from the EQ or open, it may signal overextension and a potential snap back to the midpoint or range.
2. Breakout Confirmation
Sustained price action beyond ±1.0 levels may indicate trend strength or continuation beyond historical balance zones.
3. Contextual Range Awareness
EQ and Open provide structure from which traders can judge whether price is in a state of balance or imbalance.
Labels offer at-a-glance interpretation of key levels across any chosen timeframe.
4. Fractal and Multi-Session Analysis
Analysts can layer daily, weekly, and monthly versions of this indicator to observe confluence or divergence of higher timeframe structure.

Close Above Prev High / Below Prev LowIdentifies candles that close above the previous candle's high (bullish) and candles that close below the previous candle's low (bearish). Helps with decisions for entry and exit.

ZYTX SuperTrend V1ZYTX SuperTrend V1 Indicator
Multi-strategy intelligent rebalancing with >95% win rate
Enables 24/7 automated trading

ZYTX CCI SuperTrendZYTX CCI SuperTrend
The definitive integration of CCI and SuperTrend trend-following indicators, delivering exemplary performance in automated trading bots.

Perfect MA Touch – Full Setup 1,3,5,7,8,9 v2This indicator helps you track a precise candle countdown from a moving average touch, labeling key bars (1, 3, 5, 7, 8, 9) for timing entries and momentum setups — with optional coloring, alerts, and full customization.
What It Detects
1. MA Touch Trigger
The sequence starts when any selected moving average (up to 6 MAs, customizable) is touched by the candle's high/low range.
This "perfect touch" initiates the count and labels that candle as "1".
2. Candle Number Labels
After a perfect MA touch:
Candle 1 = the bar that touches the MA
Candle 3 = two bars after Candle 1
Candle 5 = the fifth bar after the touch
Candle 7 = third bar after Candle 5
Candle 8 = fourth bar after Candle 5
Candle 9 = fifth bar after Candle 5
It creates a time-based sequence you can use to anticipate reactions or momentum shifts.
3. Customization
You can:
Choose between EMA or SMA for each MA (6 total)
Set custom lengths for each MA (9, 20, 50, 100, 150, 200)
Choose which candle numbers (1, 3, 5, 7, 8, 9) to highlight
Pick font size and label color
4. Highlighting and Alerts
Highlight candles (with color) when certain bars (like 3, 5, 7) print
Alerts are available for all tracked bars (1, 3, 5, 7, 8, 9)
Use Case Example
Let’s say you want to enter trades on the 3rd candle after a perfect MA touch:
You set the script to highlight candle 3.
When a candle hits your chosen MA (say EMA 9), it’s labeled “1”.
Two bars later, bar 3 appears — giving you a timed signal to enter if price behavior aligns.
This method is especially useful when paired with:
Volume confirmation
Breakout or reversal patterns
Support/resistance or order block zones

Mariam 5m Scalping Breakout StrategyPurpose
A 5-minute scalping breakout strategy designed to capture fast 3-5 pip moves with high probability, using premium/discount zone filters and market bias conditions. Developed for traders seeking consistent scalps with a proven win rate above 95–98% in optimal conditions.
How It Works
The script monitors price action in 5-minute intervals, forming a 15-minute high and low range by tracking the highs and lows of the first 3 consecutive 5-minute candles starting from a custom time. In the next 3 candles, it waits for a breakout above the 15m high or below the 15m low while confirming market bias using custom equilibrium zones.
Buy signals trigger when price breaks the 15m high while in a discount zone
Sell signals trigger when price breaks the 15m low while in a premium zone
The strategy simulates trades with fixed 3-5 pip take profit and stop loss values (configurable). All trades are recorded in a table with live trade results and an automatically updated win rate, typically achieving over 90–95% accuracy in favorable market conditions.
Features
Designed exclusively for the 5-minute timeframe
Custom 15-minute high/low breakout logic
Premium, Discount, and Equilibrium zone display
Built-in backtest tracker with live trade results, statistics, and win rate
Customizable start time, take profit, and stop loss settings
Real-time alerts on breakout signals
Visual markers for trade entries and failed trades
Consistent win rate exceeding 90–95% on average when following market conditions
Usage Tips
Use strictly on 5-minute charts for accurate signal performance. Avoid during high-impact news releases.
Important: Once a trade is opened, manually set your take profit at +3 to +5 pips immediately to secure the move, as these quick scalps often hit the target within a single candle. This prevents missed exits during rapid price action.

Opening Candle Indicator V4
Details of this release:
1. Add an alert with two conditions:
- Price breaks the highest candlestick opening and closing above it.
- Price breaks the VWAP indicator value.
2. Integrate the VWAP indicator and the 200 EMA with the main indicator.
3. Display buy and sell signals based on specific conditions related to the VWAP breakout.
4. Increase target lines to five.
5. Most importantly, I added custom windows in the settings to apply the indicator to other markets based on adding the opening and closing times for any market with a daily opening and closing time.
Important note: The second buy signal, which comes after a sell signal appears, is based on two conditions: a close above the high of the previous sell signal and a close above VWAP
Warning - Buy or sell signals are only warning signals and the user is responsible for evaluating and studying this signal.
**Fixed some errors in the previous script
تفاصيل هذا الإصدار:
1-أضفت تنبيه يحتوي على شرطين
-إختراق السعر الأعلى لشمعة الإفتتاح والإغلاق فوقها.
-إختراق السعر لقيمة مؤشر vwap.
2-دمج مؤشر vwap والمتوسط الأسي 200 مع المؤشرالرئيسي
3- إظهار إشارات الشراء والبيع بشروط معينة مرتبطة بإختراق vwap
4-زيادة خطوط الأهداف إلى خمس.
5- وهي الأهم أضفت نوافذ مخصصة في الاعدادت لتطبيق المؤشر على الأسواق الأخرى بناء على إضافة وقت الإفتتاح والإغلاق لأي سوق له وقت إفتتاح ووقت إغلاق يومي.
ملاحظة مهمة:إشارة الشراء الثانية والتي تأتي بعد ظهور إشارة بيع وضعت بناء على شرطين وهما الاغلاق فوق الاعلى لإشارة البيع السابقة والاغلاق فوق مؤشر VWAP
تحذير-إشارات الشراء أو البيع ليست إلا إشارات تحذيرية والمستخدم هو المسئول عن تقييم ودراسة هذه الإشارة
**اصلاح بعض الاخطاء في السكربت الماضي

Zero Lag Trend Signals (MTF) [AlgoAlpha]// This Pine Script™ code is subject to the terms of the Mozilla Public License 2.0 at mozilla.org
// © AlgoAlpha
//@version=5
indicator("Zero Lag Trend Signals (MTF) ", shorttitle="AlgoAlpha - 0️⃣Zero Lag Signals", overlay=true)
length = input.int(70, "Length", tooltip = "The Look-Back window for the Zero-Lag EMA calculations", group = "Main Calculations")
mult = input.float(1.2, "Band Multiplier", tooltip = "This value controls the thickness of the bands, a larger value makes the indicato less noisy", group = "Main Calculations")
t1 = input.timeframe("5", "Time frame 1", group = "Extra Timeframes")
t2 = input.timeframe("15", "Time frame 2", group = "Extra Timeframes")
t3 = input.timeframe("60", "Time frame 3", group = "Extra Timeframes")
t4 = input.timeframe("240", "Time frame 4", group = "Extra Timeframes")
t5 = input.timeframe("1D", "Time frame 5", group = "Extra Timeframes")
green = input.color(#00ffbb, "Bullish Color", group = "Appearance")
red = input.color(#ff1100, "Bearish Color", group = "Appearance")
src = close
lag = math.floor((length - 1) / 2)
zlema = ta.ema(src + (src - src ), length)
volatility = ta.highest(ta.atr(length), length*3) * mult
var trend = 0
if ta.crossover(close, zlema+volatility)
trend := 1
if ta.crossunder(close, zlema-volatility)
trend := -1
zlemaColor = trend == 1 ? color.new(green, 70) : color.new(red, 70)
m = plot(zlema, title="Zero Lag Basis", linewidth=2, color=zlemaColor)
upper = plot(trend == -1 ? zlema+volatility : na, style = plot.style_linebr, color = color.new(red, 90), title = "Upper Deviation Band")
lower = plot(trend == 1 ? zlema-volatility : na, style = plot.style_linebr, color = color.new(green, 90), title = "Lower Deviation Band")
fill(m, upper, (open + close) / 2, zlema+volatility, color.new(red, 90), color.new(red, 70))
fill(m, lower, (open + close) / 2, zlema-volatility, color.new(green, 90), color.new(green, 70))
plotshape(ta.crossunder(trend, 0) ? zlema+volatility : na, "Bearish Trend", shape.labeldown, location.absolute, red, text = "▼", textcolor = chart.fg_color, size = size.small)
plotshape(ta.crossover(trend, 0) ? zlema-volatility : na, "Bullish Trend", shape.labelup, location.absolute, green, text = "▲", textcolor = chart.fg_color, size = size.small)
plotchar(ta.crossover(close, zlema) and trend == 1 and trend == 1 ? zlema-volatility*1.5 : na, "Bullish Entry", "▲", location.absolute, green, size = size.tiny)
plotchar(ta.crossunder(close, zlema) and trend == -1 and trend == -1 ? zlema+volatility*1.5 : na, "Bearish Entry", "▼", location.absolute, red, size = size.tiny)
s1 = request.security(syminfo.tickerid, t1, trend)
s2 = request.security(syminfo.tickerid, t2, trend)
s3 = request.security(syminfo.tickerid, t3, trend)
s4 = request.security(syminfo.tickerid, t4, trend)
s5 = request.security(syminfo.tickerid, t5, trend)
s1a = s1 == 1 ? "Bullish" : "Bearish"
s2a = s2 == 1 ? "Bullish" : "Bearish"
s3a = s3 == 1 ? "Bullish" : "Bearish"
s4a = s4 == 1 ? "Bullish" : "Bearish"
s5a = s5 == 1 ? "Bullish" : "Bearish"
if barstate.islast
var data_table = table.new(position=position.top_right, columns=2, rows=6, bgcolor=chart.bg_color, border_width=1, border_color=chart.fg_color, frame_color=chart.fg_color, frame_width=1)
table.cell(data_table, text_halign=text.align_center, column=0, row=0, text="Time Frame", text_color=chart.fg_color)
table.cell(data_table, text_halign=text.align_center, column=1, row=0, text="Signal", text_color=chart.fg_color)
table.cell(data_table, text_halign=text.align_center, column=0, row=1, text=t1, text_color=chart.fg_color)
table.cell(data_table, text_halign=text.align_center, column=1, row=1, text=s1a, text_color=chart.fg_color, bgcolor=s1a == "Bullish" ? color.new(green, 70) : color.new(red, 70))
table.cell(data_table, text_halign=text.align_center, column=0, row=2, text=t2, text_color=chart.fg_color)
table.cell(data_table, text_halign=text.align_center, column=1, row=2, text=s2a, text_color=chart.fg_color, bgcolor=s2a == "Bullish" ? color.new(green, 70) : color.new(red, 70))
table.cell(data_table, text_halign=text.align_center, column=0, row=3, text=t3, text_color=chart.fg_color)
table.cell(data_table, text_halign=text.align_center, column=1, row=3, text=s3a, text_color=chart.fg_color, bgcolor=s3a == "Bullish" ? color.new(green, 70) : color.new(red, 70))
table.cell(data_table, text_halign=text.align_center, column=0, row=4, text=t4, text_color=chart.fg_color)
table.cell(data_table, text_halign=text.align_center, column=1, row=4, text=s4a, text_color=chart.fg_color, bgcolor=s4a == "Bullish" ? color.new(green, 70) : color.new(red, 70))
table.cell(data_table, text_halign=text.align_center, column=0, row=5, text=t5, text_color=chart.fg_color)
table.cell(data_table, text_halign=text.align_center, column=1, row=5, text=s5a, text_color=chart.fg_color, bgcolor=s5a == "Bullish" ? color.new(green, 70) : color.new(red, 70))
/////////////////////////////////////////ALERTS FOR SMALL ARROWS (ENTRY SIGNALS)
alertcondition(ta.crossover(close, zlema) and trend == 1 and trend == 1, "Bullish Entry Signal",
message="Bullish Entry Signal detected. Consider entering a long position.")
alertcondition(ta.crossunder(close, zlema) and trend == -1 and trend == -1, "Bearish Entry Signal",
message="Bearish Entry Signal detected. Consider entering a short position.")
/////////////////////////////////////////ALERTS FOR TREND CONDITIONS
alertcondition(ta.crossover(trend, 0), "Bullish Trend")
alertcondition(ta.crossunder(trend, 0), "Bearish Trend")
alertcondition(ta.cross(trend, 0), "(Bullish or Bearish) Trend")
alertcondition(ta.crossover(s1, 0), "Bullish Trend Time Frame 1")
alertcondition(ta.crossunder(s1, 0), "Bearish Trend Time Frame 1")
alertcondition(ta.cross(s1, 0), "(Bullish or Bearish) Trend Time Frame 1")
alertcondition(ta.crossover(s2, 0), "Bullish Trend Time Frame 2")
alertcondition(ta.crossunder(s2, 0), "Bearish Trend Time Frame 2")
alertcondition(ta.cross(s2, 0), "(Bullish or Bearish) Trend Time Frame 2")
alertcondition(ta.crossover(s3, 0), "Bullish Trend Time Frame 3")
alertcondition(ta.crossunder(s3, 0), "Bearish Trend Time Frame 3")
alertcondition(ta.cross(s3, 0), "(Bullish or Bearish) Trend Time Frame 3")
alertcondition(ta.crossover(s4, 0), "Bullish Trend Time Frame 4")
alertcondition(ta.crossunder(s4, 0), "Bearish Trend Time Frame 4")
alertcondition(ta.cross(s4, 0), "(Bullish or Bearish) Trend Time Frame 4")
alertcondition(ta.crossover(s5, 0), "Bullish Trend Time Frame 5")
alertcondition(ta.crossunder(s5, 0), "Bearish Trend Time Frame 5")
alertcondition(ta.cross(s5, 0), "(Bullish or Bearish) Trend Time Frame 5")
alertcondition(ta.crossover(close, zlema) and trend == 1 and trend == 1, "Bullish Entry")
alertcondition(ta.crossunder(close, zlema) and trend == -1 and trend == -1, "Bearish Entry")
bullishAgreement = s1 == 1 and s2 == 1 and s3 == 1 and s4 == 1 and s5 == 1
bearishAgreement = s1 == -1 and s2 == -1 and s3 == -1 and s4 == -1 and s5 == -1
alertcondition(bullishAgreement, "Full Bullish Agreement", message="All timeframes agree on bullish trend.")
alertcondition(bearishAgreement, "Full Bearish Agreement", message="All timeframes agree on bearish trend.")
