TRAMA Cross Pivot Points📌 Description: TRAMA Cross Pivot Points
This indicator combines the powerful Trend Regularity Adaptive Moving Average (TRAMA) with dynamic pivot point.
🔍 What It Does:
Calculates a long-term TRAMA (default length 278) to filter trend direction and smooth volatility. I mostly use the lengths 20, 50, 100, 200, 278, and 314 to mark areas of retest.
Detects bullish and bearish price crossovers above and below the TRAMA.
Plots real-time pivot levels when a crossover occurs.
Draws a dashed horizontal pivot line only at the most recent crossover, keeping your chart clean and focused.
Includes alert conditions so you never miss a strategic moment.
⚙️ How It Works:
Bullish TRAMA Cross: When price crosses above the TRAMA, the script:
Calculates a potential pivot low using DM-style Logic.
Plots a green dashed line at that pivot level.
Optionally triggers an alert.
Bearish TRAMA Cross: When price crosses below the TRAMA:
A pivot high is calculated and plotted as a red dashed line.
Optional alert lets you know of a possible top.
📈 Pivot Logic:
Uses real-time candle data (OHLC) to adjust pivot points dynamically.
These pivots can act as potential support/resistance levels or entry zones.
🔔 Alerts:
Triggered when price crosses the TRAMA up or down.
Ideal for traders looking to enter on structure-based momentum.
Moving Averages

✅ SMA20 Trend Table -(MAJOAK)Trend table of Bullish or Bearish to the SMA 20. Displays 1 Day, 1Hr, 15 Min and 5 min.

Turtle God Indicator (Đức Anh Trader)Description:
The Turtle God Indicator is a minimalist tool that provides quick visual feedback on the latest candle's momentum while remaining compliant with TradingView's visual guidelines.
🔹 The turtle appears only on the latest candle, keeping the chart clean and uncluttered.
🔹 Includes a 14-period Simple Moving Average (SMA) to help track trend direction.
🔹 Ideal for traders who want fun, subtle alerts without distracting overlays or indicators.
Inspired by Đức Anh Trader, this playful yet practical indicator is perfect for identifying momentum with a smile. 🐢

EMA Trend Dashboard
Trend Indicator using 3 custom EMA lines. Displays a table with 5 rows(position configurable)
-First line shows relative position of EMA lines to each other and outputs Bull, Weak Bull, Flat, Weak Bear, or Bear. EMA line1 should be less than EMA line2 and EMA line 2 should be less than EMA line3. Default is 9,21,50.
-Second through fourth line shows the slant of each EMA line. Up, Down, or Flat. Threshold for what is considered a slant is configurable. Also added a "steep" threshold configuration for steep slants.
-Fifth line shows exhaustion and is a simple, configurable calculation of the distance between EMA line1 and EMA line2.
--Lines one and five change depending on its value but ALL other colors are able to be changed.
--Default is somewhat set to work well with Micro E-mini Futures but this indicator can be changed to work on anything. I created it to help get a quick overview of short-term trend on futures. I used ChatGPT to help but I am still not sure if it actually took longer because of it.

Reverso [Flexi+]Reverso – Moving Average Touch Statistics Tracker
Reverso is a premium technical analysis tool that tracks and visualizes how price interacts with a selected Moving Average (EMA/SMA).
Providing detailed statistics about price behavior before, during, and after each Moving Average touch event.
This script is suitable for both trend-following and mean-reversion traders who want to study price reaction with respect to a Moving Average, understand market tendencies, and refine entry/exit strategies based on price-memory dynamics.
Features and Functionality
Supported MAs: EMA / SMA any length
Timeframe Support: any Timeframe >= to the current chart Timeframe
Touch Detection: Triggered when the price range (high to low) crosses or touches the selected MA
Automatic Data Tracking
Tables for Quick Visual Summary
Visual Overlay: Optional Moving Average line plotted on chart
History: User selectable up to 500 touches
Automatic Data Tracking:
Number of MA touches
Time intervals between touches
Price distance from last touch
Maximum price deviation (above/below MA) between touches
Time spent above/below MA
Tables for Quick Visual Summary:
Info Table: Live details about last and first touches, distance from touch, bars above/below, peak movements since last touch
Stats Table: Averages and extreme values for price behavior patterns across recent history
Core Metrics Tracked
Last Touch Price: The last price level where price touched the MA
Distance from Last Touch: Current % change from the last touch price
Time Between Touches: Average and maximum intervals (in bars or time) between touch events
Max Distance Above/Below: Peak movement above/below MA between touches
Bars Above/Below: How long price stayed above/below the MA since last touch
Peak This Cycle: Max deviation above/below in current cycle since last touch
How It Works
Reverso monitors each bar to check if price intersects the selected MA.
When a new touch occurs, it records the touch price and time, and resets the tracking cycle.
From that point forward, it tracks how far and how long price drifts above or below the MA.
This process repeats with each new touch, building a detailed profile of how price behaves around the moving average.
The result is a visual and statistical framework for understanding price memory, market rhythm, and mean-reversion opportunities.
Customization Options
Moving Average Type: Simple or Exponential
MA Length: Any
Show MA Line: Toggle the MA plot on the chart
Show Info Table: Enable/disable the current-touch summary
Show Statistics Table: Show aggregate data over the history
Table Positioning: Customizable placement for both tables
MA Color: Select custom color for MA plot
Max History: Number of touches used for the Statistic computation
Intended Use Cases
Identify reversal or continuation setups near MAs
Validate strategies relying on mean reversion
Backtest the consistency of price respect to MAs
Detect periods of volatility clustering around MAs
Notes and Disclaimers
This script does not repaint: calculations are made on confirmed bars.
This indicator is educational in nature and should be used alongside other forms of analysis.
Time durations in the tables are approximated using bar timing and may vary across markets/timeframes.

ReversoReverso – Moving Average Touch Statistics Tracker
Reverso indicator is a technical analysis tool that tracks and visualizes how price interacts with a selected Exponential Moving Average (EMA). It provides detailed statistics about price behavior before, during, and after each EMA touch event.
This script is suitable for both trend-following and mean-reversion traders who want to study EMA reactions, understand market tendencies, and refine entry/exit strategies based on price-memory dynamics.
Features and Functionality
Supported MAs: EMA 9, 20, or 50
Timeframe Support: Uses the chart’s timeframe
Touch Detection: Triggered when the price range (high to low) crosses or touches the EMA
Automatic Data Tracking
Tables for Quick Visual Summary
Visual Overlay: Optional EMA line plotted on chart
Timeframe Support: Uses the chart’s timeframe
Capped history: Most recent 50 touches
Automatic Data Tracking:
Number of EMA touches
Time intervals between touches
Price distance from last touch
Maximum price deviation (above/below EMA) between touches
Time spent above/below EMA
Tables for Quick Visual Summary:
Info Table: Live details about last and first touches, distance from touch, bars above/below, peak movements since last touch
Stats Table: Averages and extreme values for price behavior patterns across recent history
Core Metrics Tracked
Last Touch Price: The last price level where price touched the EMA
Distance from Last Touch: Current % change from the last touch price
Time Between Touches: Average and maximum intervals (in bars or time) between touch events
Max Distance Above/Below: Peak movement above/below EMA between touches
Bars Above/Below: How long price stayed above/below the EMA since last touch
Peak This Cycle: Max deviation above/below in current cycle since last touch
How It Works
Reverso monitors each bar to check if price intersects the selected EMA.
When a new touch occurs, it records the touch price and time, and resets the tracking cycle.
From that point forward, it tracks how far and how long price drifts above or below the EMA.
This process repeats with each new touch, building a detailed profile of how price behaves around the moving average.
The result is a visual and statistical framework for understanding price memory, market rhythm, and mean-reversion opportunities.
Customization Options
EMA Length: Choose from EMA 9, 20, or 50
Show MA Line: Toggle the EMA plot on the chart
Show Info Table: Enable/disable the current-touch summary
Show Statistics Table: Show aggregate data over the history
Table Positioning: Customizable placement for both tables
MA Color: Select custom color for EMA plot
Intended Use Cases
Identify reversal or continuation setups near EMAs
Validate strategies relying on mean reversion
Backtest the consistency of price respect to EMAs
Detect periods of volatility clustering around EMAs
Notes and Disclaimers
This script does not repaint: calculations are made on confirmed bars.
This indicator is educational in nature and should be used alongside other forms of analysis.
Time durations in the tables are approximated using bar timing and may vary across markets/timeframes.

Normalized EMA Cycle (NEC)Normalized EMA Cycle (NEC)
The Normalized EMA Cycle (NEC) is a versatile momentum and trend reversal tool designed to detect high-probability turning points and gauge the strength of price cycles.
It combines fast and slow Exponential Moving Averages (EMAs), dynamic normalization, and adaptive transparency to create clear, intuitive reversal signals on the chart.
🔹 How It Works
EMA Differencing
The NEC calculates the difference between a fast EMA and a slower EMA:
Fast EMA Length (default 6) captures short-term momentum.
Slow EMA Length (default 16) tracks broader trends.
The slope of this difference identifies accelerating or decelerating momentum.
Normalization to 0–100 Scale
The raw EMA difference is scaled relative to the recent Alpha Period range (default 6 bars).
This transforms the value into a normalized oscillator ranging between 0 and 100.
A 3-period Hull Moving Average (HMA) smooths this series to reduce noise.
Overbought and Oversold Thresholds
By default:
Overbought Level: 75
Oversold Level: 25
Crossovers of these levels are used to detect potential reversals.
Adaptive Alpha Adjustment
The normalized value is transformed into an “Alpha Schaff” line, dynamically shifting between price and normalized cycles.
This helps the model adjust to different volatility regimes.
Trend Reversal Logic
Bullish Reversal:
Normalized oscillator crosses above the Oversold Level.
EMA difference slope is positive.
Bearish Reversal:
Normalized oscillator crosses below the Overbought Level.
EMA difference slope is negative.
Additional confirmation comes when price crosses the Alpha Schaff line in the direction of momentum.
Dynamic Confidence Visualization
The indicator calculates a trend confidence score based on the normalized separation of the EMAs.
The transparency of reversal markers dynamically adjusts:
Strong trends = more opaque signals
Weak trends = more transparent signals
🔹 How to Use
✅ Entries
Long Signal: Aqua upward label appears below a bar.
Conditions:
Bullish reversal or price crossing above Alpha Schaff
Normalized slope is rising
Short Signal: Fuchsia downward label appears above a bar.
Conditions:
Bearish reversal or price crossing below Alpha Schaff
Normalized slope is falling
✅ Trend Strength
The less transparent the signal marker, the more significant the trend.
✅ Customization
Use the inputs to fine-tune sensitivity:
Shorter EMAs: Faster signals
Longer EMAs: Smoother trends
Alpha Period: Adjusts the lookback range for normalization
🟢 Best Practices
NEC is best used in combination with other trend confirmation tools (e.g., price structure, volume, or higher timeframe EMAs).
Avoid relying on signals in extremely low-volume or choppy ranges.
⚠️ Disclaimer
This script is intended for educational purposes only and does not constitute financial advice. Trading involves substantial risk, and you should consult your financial advisor before making any investment decisions.

Vela dominante con cruce de ema y zona horaria (Juan H.)Indicator Description: "Dominant Candle + EMA Cross + Time Zones"
This indicator was specifically designed for intraday trading on the EUR/USD pair, following a methodology based on price action, liquidity, and market structure.
🕒 Suggested Trading Hours (Argentina Time):
Early London Session: 3:00 AM to 6:00 AM
New York Session: 10:30 AM to 12:00 PM
📌 Trading Strategy:
Time Block: 3:00 AM – 6:00 AM:
Before entering any trade, I wait for the price to break the high or low of the Asian session, clearly marked on the chart by the lines extending from the Asia box.
If the Asian low is broken: I will only look for buy signals.
If the Asian high is broken: I will only look for sell signals.
I enter only on the first signal that appears after the break, always following the direction of the breakout.
Stop Loss Placement:
For buys: Below the last FVG (Fair Value Gap) that is located below the 11 and 21 EMAs.
For sells: Above the last FVG that is above the 11 and 21 EMAs.
Time Block: 10:30 AM – 12:00 PM:
The same logic applies, but in this case, I wait for a breakout of the London session’s high or low.
If the high or low of London has not been broken before 12:00 PM, I skip trading for that block.
🎯 Trade Management:
Minimum recommended Risk-Reward Ratio: 1:2
My personal approach: I target a 1:3 R:R, applying fractional profit-taking:
20% of the position at 1:1
40% at 1:2
40% at 1:3
I highly recommend each trader conduct their own backtesting to find the TP distribution that best suits their style.
📍 Signal Conditions:
Signals from this indicator won’t trigger under just any circumstances. They appear only when several quality filters are met:
The signal must occur outside a range-bound zone.
The signal requires a dominant (engulfing) candle that crosses the 21 EMA.
Usually, the same candle that generates the signal forms an FVG, making it easier to define a technical and logical Stop Loss level.
This approach aims to increase win probability by combining:
Price Action + Structure + Liquidity + Intraday Timing.
I hope this tool adds value to your trading!

Cruce de 3EMAs CHL - Multi Temporalidad📈 3EMAs Crossover CHL – Multi-Timeframe
📊 Overview
An advanced technical analysis indicator that combines the classic 3 EMA system (10, 50, 200) with an innovative multi-timeframe panel. Designed for traders seeking confluences across different timeframes to make more informed decisions.
🎯 Key Features
✅ 3 EMA System
EMA 10 (Blue): Fast signal for short-term movements
EMA 50 (Orange): Intermediate trend filter
EMA 200 (Purple): Main trend and key support/resistance level
✅ Automatic Visual Signals
Green Triangle (↑): Bullish crossover – EMA 10 crosses above EMA 50
Red Triangle (↓): Bearish crossover – EMA 10 crosses below EMA 50
Colored Background: Green for bullish trend, red for bearish
✅ Multi-Timeframe Panel (Bottom Right Corner)
Analyzes 5 timeframes simultaneously:
5M: Ideal for scalping and precise entries
15M: Short-term swing trading
1H: Intraday analysis
4H: Mid-term swing trading
1D: Primary trend
✅ Panel Information
4 Informative Columns:
Time: Analyzed timeframe
EMA: ↑ (Bullish) / ↓ (Bearish) based on EMA 10 vs EMA 50
Trend: Clearly defined Bullish/Bearish
EMA200: Relative position (Above / Below / In-between)
🚀 Unique Advantages
📋 Confluence Analysis
Detects when multiple timeframes are aligned
Stronger signals when timeframes show confluence
Avoids false signals using higher-timeframe filters
📋 Improved Risk Management
EMA 200 Below: Strong support – favorable for longs
EMA 200 Above: Strong resistance – favorable for shorts
EMA 200 In-between: Indecision zone – caution advised
📋 Trading Versatility
Scalping: Use 5M and 15M for quick entries
Day Trading: Combine 15M, 1H, and 4H
Swing Trading: Focus on 4H and 1D
Position Trading: Use 1D as main filter
🎨 Color Coding
🟢 Green (Bullish)
↑ Arrows in the panel
EMA 10 > EMA 50
EMA 200 below both EMAs (support)
🔴 Red (Bearish)
↓ Arrows in the panel
EMA 50 > EMA 10
EMA 200 above both EMAs (resistance)
🟡 Yellow (Caution)
EMA 200 in intermediate position
Market in transition or consolidation
📊 How to Use It
🎯 For Long Entries
Look for bullish confluence across multiple timeframes
Ensure EMA 200 is “Below” (acting as support)
Wait for a bullish crossover on the entry timeframe
Confirm with higher timeframes
🎯 For Short Entries
Look for bearish confluence across multiple timeframes
Ensure EMA 200 is “Above” (acting as resistance)
Wait for a bearish crossover on the entry timeframe
Confirm with higher timeframes
🎯 Position Management
Partial Close: When lower timeframes shift
Full Close: When higher timeframes reverse
Stop Loss: Based on EMA 200 as support/resistance
⚙️ Customizable Settings
EMA Periods: Adjustable (default: 10, 50, 200)
Automatic Alerts: For bullish and bearish crossovers
Colors: Fully customizable
📈 Recommended Markets
Forex: All major and minor pairs
Cryptocurrencies: Bitcoin, Ethereum, Altcoins
Indices: S&P 500, NASDAQ, DAX, etc.
Commodities: Gold, Oil, Silver
Stocks: Any stock with sufficient liquidity
⚠️ Important Considerations
Works best in trending markets
Use with caution in sideways markets
Combine with other indicators for confirmation
Always apply proper risk management
💬 Support
Indicator developed by CHL Trading. For inquiries, suggestions, or bug reports, contact via comments or cristma95@gmail.com.

Logarithmic Moving Average (LMA) [QuantAlgo]🟢 Overview
The Logarithmic Moving Average (LMA) uses advanced logarithmic weighting to create a dynamic trend-following indicator that prioritizes recent price action while maintaining statistical significance. Unlike traditional moving averages that use linear or exponential weights, this indicator employs logarithmic decay functions to create a more sophisticated price averaging system that adapts to market volatility and momentum conditions.
The indicator displays a smoothed signal line that oscillates around zero, with positive values indicating bullish momentum and negative values indicating bearish momentum. The signal incorporates trend quality assessment, momentum confirmation, and multiple filtering mechanisms to help traders and investors identify trend continuation and reversal opportunities across different timeframes and asset classes.
🟢 How It Works
The indicator's core innovation lies in its logarithmic weighting system, where weights are calculated using the formula: w = 1.0 / math.pow(math.log(i + steepness), 2) The steepness parameter controls how aggressively recent data is prioritized over historical data, creating a dynamic weight decay that can be fine-tuned for different trading styles. This logarithmic approach provides more nuanced weight distribution compared to exponential moving averages, offering better responsiveness while maintaining stability.
The LMA calculation combines multiple sophisticated components. First, it calculates the logarithmic weighted average of closing prices. Then it measures the slope of this average over a 10-period lookback: lmaSlope = (lma - lma ) / lma * 100 The system also incorporates trend quality assessment using R-squared correlation analysis of log-transformed prices, measuring how well the price data fits a linear trend model over the specified period.
The final signal generation uses the formula: signal = lmaSlope * (0.5 + rSquared * 0.5) which combines the LMA slope with trend quality weighting. When momentum confirmation is enabled, the indicator calculates annualized log-return momentum and applies a multiplier when the momentum direction aligns with the signal direction, strengthening confirmed signals while filtering out weak or counter-trend movements.
🟢 How to Use
1. Signal Interpretation and Threshold Zones
Positive Values (Above Zero): LMA slope indicating bullish momentum with upward price trajectory relative to logarithmic baseline
Negative Values (Below Zero): LMA slope indicating bearish momentum with downward price trajectory relative to logarithmic baseline
Zero Line Crosses: Signal transitions between bullish and bearish regimes, indicating potential trend changes
Long Entry Threshold Zone: Area above positive threshold (default 0.5) indicating confirmed bullish signals suitable for long positions
Short Entry Threshold Zone: Area below negative threshold (default -0.5) indicating confirmed bearish signals suitable for short positions
Extreme Values: Signals exceeding ±1.0 represent strong momentum conditions with higher probability of continuation
2. Momentum Confirmation and Visual Analysis
Signal Color Intensity: Gradient coloring shows signal strength, with brighter colors indicating stronger momentum
Bar Coloring: Optional price bar coloring matches signal direction for quick visual trend identification
Position Labels: Real-time position classification (Bullish/Bearish/Neutral) displayed on the latest bar
Momentum Weight Factor: When short-term log-return momentum aligns with LMA signal direction, the signal receives additional weight confirmation
Trend Quality Component: R-squared values weight the signal strength, with higher correlation indicating more reliable trend conditions
3. Examples: Preconfigured Settings
Default: Universally applicable configuration balanced for medium-term investing and general trading across multiple timeframes and asset classes.
Scalping: Highly responsive setup with shorter period and higher steepness for ultra-short-term trades on 1-15 minute charts, optimized for quick momentum shifts.
Swing Trading: Extended period with moderate steepness and increased smoothing for multi-day positions, designed to filter noise while capturing larger price swings on 1-4 hour and daily charts.
Trend Following: Maximum smoothing with lower steepness for established trend identification, generating fewer but more reliable signals optimal for daily and weekly timeframes.
Mean Reversion: Shorter period with high steepness for counter-trend strategies, more sensitive to extreme moves and reversal opportunities in ranging market conditions.

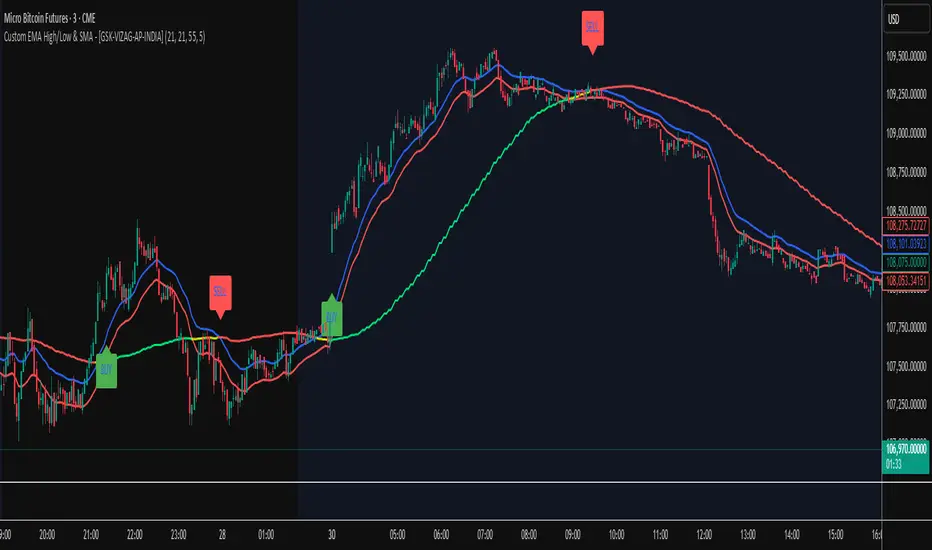
Custom EMA High/Low & SMA - [GSK-VIZAG-AP-INDIA] Custom EMA High/Low & SMA -
1. Overview
This indicator overlays a dynamic combination of Exponential Moving Averages (EMA) and Simple Moving Average (SMA) to identify momentum shifts and potential entry/exit zones. It highlights bullish or bearish conditions using color-coded SMA logic and provides visual Buy/Sell signals based on smart crossover and state-based logic.
2. Purpose / Use Case
Designed for traders who want to visually identify momentum breakouts, trend reversals, or pullback opportunities, this tool helps:
Spot high-probability buy/sell zones
Confirm price strength relative to volatility bands (EMA High/Low)
Time entries based on clean visual cues
It works well in trend-following strategies, particularly in intraday or swing setups across any liquid market (indices, stocks, crypto, etc.).
3. Key Features & Logic
✅ EMA High/Low Channel: Acts as dynamic support/resistance boundaries using 20-period EMAs on high and low prices.
✅ Timeframe-Specific SMA: A 33-period SMA calculated from a user-defined timeframe (default: 10-minute) for flexible multi-timeframe analysis.
✅ Signal Generation:
Buy: When SMA drops below EMA Low and close is above EMA High.
Sell: When SMA rises above EMA High and price closes below both EMAs.
Optionally, signals also fire based on SMA color changes (green = bullish, red = bearish).
✅ Strict or Loose Signal Logic: Choose between precise crossovers or broader state-based conditions.
✅ Debugging Tools: Optional markers for granular insight into condition logic.
4. User Inputs & Settings
Input Description
EMA High Length Period for EMA of high prices (default: 20)
EMA Low Length Period for EMA of low prices (default: 20)
SMA Length Period for Simple Moving Average (default: 33)
SMA Timeframe Timeframe for SMA (default: “10”)
Show Buy/Sell Arrows Enable visual arrow signals for Buy/Sell
Strict Signal Logic ON = crossover-based signals; OFF = state logic
Plot Signals on SMA Color Change Enable signals on SMA color shifts (Green/Red)
Show Debug Markers Plot small markers to debug condition logic
5. Visual Elements Explained
🔵 EMA High Line – Blue line marking dynamic resistance
🔴 EMA Low Line – Red line marking dynamic support
🟡 SMA Line – Color-coded based on position:
Green if SMA < EMA Low (Bullish)
Red if SMA > EMA High (Bearish)
Yellow otherwise (Neutral)
✅ BUY / SELL Labels – Displayed below or above candles on valid signals
🛠️ Debug Circles/Triangles – Help visually understand the signal logic when enabled
6. Usage Tips
Best used on 5–30 min timeframes for intraday setups or 1H+ for swing trades.
Confirm signals with volume, price action, or other confluences (like support/resistance).
Use strict mode for more accurate entries, and non-strict mode for broader trend views.
Ideal for identifying pullbacks into trend, or early reversals after volatility squeezes.
7. What Makes It Unique
Multi-timeframe SMA integrated with EMA High/Low bands
Dual signal logic (crossover + color shift)
Visually intuitive and beginner-friendly
Minimal clutter with dynamic signal labeling
Debug mode for transparency and learning
8. Alerts & Automation
The indicator includes built-in alert conditions for:
📈 Buy Alert: Triggered when a bullish condition is detected.
🔻 Sell Alert: Triggered when bearish confirmation is detected.
These alerts can be used with TradingView's alert system for real-time notifications or bot integrations.
9. Technical Concepts Used
EMA (Exponential Moving Average): Reacts faster to recent price, ideal for trend channels
SMA (Simple Moving Average): Smoother average for detecting general trend direction
Crossover Logic: Checks when SMA crosses over or under EMA levels
Color Coding: Visual signal enhancement based on relative positioning
Multi-Timeframe Analysis: SMA calculated on a custom timeframe, powerful for confirmation
10. Disclaimer
This script is for educational and informational purposes only. It is not financial advice. Always backtest thoroughly and validate on demo accounts before applying to live markets. Trading involves risk, and past performance does not guarantee future results.
11. Author Signature
📌 Indicator Name: Custom EMA High/Low & SMA -
👤 Author: GSK-VIZAG-AP-INDIA
Volumen Consolidado Exchanges [JoseMetal]============
ENGLISH
============
- General description:
This is a consolidated volume indicator that allows you to pick up to 10 exchanges to consolidate volume, which can be displayed split or merged.
- Features:
Shows per-exchange volume with custom exchange selection.
Able to toggle on/off each exchange.
Able to customize color for each exchange.
Toggleable total (sum) volume with custom SMA.
- Visual:
Volume is sorted from highest to lowest, so you can see every single exchange's color volume.
Accumulated volume is white, and SMA is red.
- Recommendations:
Perfect for trading with volume strategies or using as confirmation with order blocks or FVGs.
============
ESPAÑOL
============
- Descripción general:
Este es un indicador de volumen consolidado que permite seleccionar hasta 10 exchanges para consolidar el volumen, el cual puede mostrarse dividido o fusionado.
- Características:
Muestra el volumen por exchange con selección personalizada de exchanges.
Posibilidad de activar/desactivar cada exchange.
Posibilidad de personalizar el color de cada exchange.
Volumen total (suma) activable/desactivable con SMA personalizable.
- Visual:
El volumen se ordena de mayor a menor, de forma que puedes ver el volumen de color de cada exchange individual.
El volumen acumulado es blanco, y la SMA es roja.
- Recomendaciones:
Perfecto para operar con estrategias de volumen o usar como confirmación con order blocks o FVGs.

8H 现货指标Fisherman Community, internal indicators for students!
The indicator uses yellow and blue K-lines to indicate the market's buy and sell signals


Madrid Moving Average Ribbon (WMA)Madrid Moving Average Ribbon (WMA version)
This indicator visualizes a ribbon of 19 Weighted Moving Averages (WMA), ranging from 5 to 100 periods in 5-step increments. Each WMA is color-coded based on its slope and its position relative to the 100-period WMA, which serves as a baseline.
Color Logic:
LIME: Strong uptrend (rising and above WMA100)
GREEN: Possible recovery (rising but below WMA100)
MAROON: Potential reversal warning (falling but above WMA100)
RED (RUBI): Confirmed downtrend (falling and below WMA100)
GRAY: Neutral or unclear
Use this indicator to quickly evaluate trend direction, strength, and potential reversal zones.
Ideal for trend-following, swing trading, and visual confirmation strategies.
----
Madrid 이동평균 리본 (WMA 버전)
이 인디케이터는 5에서 100까지 5단위로 증가하는 총 19개의 WMA(가중이동평균)를 리본 형태로 시각화합니다.
각 선은 기준선인 WMA100을 중심으로 기울기와 상대적 위치에 따라 색상이 지정됩니다.
색상 의미:
라임색 (LIME): 강한 상승 추세 (상승 중이며 WMA100 위에 위치)
초록색 (GREEN): 반등 가능성 (상승 중이나 WMA100 아래에 위치)
밤색 (MAROON): 하락 반전 경고 (하락 중이지만 WMA100 위에 위치)
빨간색 (RUBI): 명확한 하락 추세 (하락 중이며 WMA100 아래에 위치)
회색 (GRAY): 방향성 불명확 (횡보 또는 모호한 구간)
이 지표는 추세의 방향성과 강도, 그리고 전환 구간을 빠르게 파악할 수 있도록 도와줍니다.
추세 추종, 스윙 트레이딩, 시각적 확인 보조지표로 적합합니다.

GCM Bull Bear RiderGCM Bull Bear Rider (GCM BBR)
Your Ultimate Trend-Riding Companion
GCM Bull Bear Rider is a comprehensive, all-in-one trend analysis tool designed to eliminate guesswork and provide a crystal-clear view of market direction. By leveraging a highly responsive Jurik Moving Average (JMA), this indicator not only identifies bullish and bearish trends with precision but also tracks their performance in real-time, helping you ride the waves of momentum from start to finish.
Whether you are a scalper, day trader, or swing trader, the GCM BBR adapts to your style, offering a clean, intuitive, and powerful visual guide to the market's pulse.
Key Features
JMA-Powered Trend Lines (UTPL & DTPL): The core of the indicator. A green "Up Trend Period Line" (UTPL) appears when the JMA's slope turns positive (buyers are in control), and a red "Down Trend Period Line" (DTPL) appears when the slope turns negative (sellers are in control). The JMA is used for its low lag and superior smoothing, giving you timely and reliable trend signals.
Live Profit Tracking Labels: This is the standout feature. As soon as a trend period begins, a label appears showing the real-time profit (P:) from the trend's starting price. This label moves with the trend, giving you instant feedback on its performance and helping you make informed trade management decisions.
Historical Performance Analysis: The profit labels remain on the chart for completed trends, allowing you to instantly review past performance. See at a glance which trends were profitable and which were not, aiding in strategy refinement and backtesting.
Automatic Chart Decluttering: To keep your chart clean and focused on significant moves, the indicator automatically removes the historical profit label for any trend that fails to achieve a minimum profit threshold (default is 0.5 points).
Dual-Ribbon Momentum System:
JMA / Short EMA Ribbon: Visualizes short-term momentum. A green fill indicates immediate bullish strength, while a red fill shows bearish pressure.
Short EMA / Long EMA Ribbon: Acts as a long-term trend filter, providing broader market context for your decisions.
"GCM Hunt" Entry Signals: The indicator includes optional pullback entry signals (green and red triangles). These appear when the price pulls back to a key moving average and then recovers in the direction of the primary trend, offering high-probability entry opportunities.
How to Use
Identify the Trend: Look for the appearance of a solid green line (UTPL) for a bullish bias or a solid red line (DTPL) for a bearish bias. Use the wider EMA ribbon for macro trend confirmation.
Time Your Entry: For aggressive entries, you can enter as soon as a new trend line appears. For more conservative entries, wait for a "GCM Hunt" triangle signal, which confirms a successful pullback.
Ride the Trend & Manage Your Trade: The moving profit label (P:) is your guide. As long as the trend line continues and the profit is increasing, you can confidently stay in the trade. A flattening JMA or a decreasing profit value can signal that the trend is losing steam.
Focus Your Strategy: Use the Display Mode setting to switch between "Buyers Only," "Sellers Only," or both. This allows you to completely hide opposing signals and focus solely on long or short opportunities.
Core Settings
Display Mode: The master switch. Choose to see visuals for "Buyers & Sellers," "Buyers Only," or "Sellers Only."
JMA Settings (Length, Phase): Fine-tune the responsiveness of the core JMA engine.
EMA Settings (Long, Short): Adjust the lengths of the moving averages that define the ribbons and "Hunt" signals.
Label Offset (ATR Multiplier): Customize the gap between the trend lines and the profit labels to avoid overlap with candles.
Filters (EMA, RSI, ATR, Strong Candle): Enable or disable various confirmation filters to strengthen the "Hunt" entry signals according to your risk tolerance.
Add the GCM Bull Bear Rider to your chart today and transform the way you see and trade the trend!
ENJOY

Crossing AveragesWe averages are crossing, volume increases. This script aims to plot the price relative to the averages that are crossing. If price markers are below the average lines, that usually indicates weakness.


RAHA - Roni's Adjusted Hybrid AverageRoni's Hybrid Moving Average Oscillator
Each value in the series is weighted inversely to its distance from the mean, meaning that outliers have less impact.
The indicator reduces distortions caused by extreme movements.
More suitable for cases such as volatile stocks.
מתנד הממוצע ההיברידי של רוני
כל ערך בסדרה מקבל משקל הפוך למרחקו מהממוצע כלומר חריגים משפיעים פחות.
האינדיקטור מצמצם עיוותים שנגרמים על ידי תנועות קיצוניות.
מתאים יותר למקרים כמו מניות תנודתיות.

Icy-Hot Visual Indicator [SciQua]🧊 Icy-Hot Visual Indicator
This indicator colors your price bars and/or chart background based on a normalized & smoothed transform of any price-based input (default: close). It gives you a quick “temperature map” of market momentum or volatility—cool blues for low readings, hot reds for high readings—without cluttering your chart.
🔍 Key Features
1. Dual Visual Layers
Candle Gradient: Applies a smooth, multi-color gradient to candle bodies and wicks based on normalized, smoothed input data
Background Gradient: Adds a semi-transparent gradient behind the candles to highlight broader trend zones or volatility regimes
2. Advanced Customization
Normalization Types: bounded, unbounded, z-score, MAD, percentile, sigmoid, tanh, rank, robust, and more
Smoothing Methods: EMA, SMA, WMA, RMA, HMA, TEMA, VWMA, Gaussian, LinReg, ExpReg, and others (12+ options)
3. Gradient Control: Choose 2–7 color stops, reverse direction, adjust display length
Flexible Source Inputs
Use any built-in price series (close, hl2, volume, etc.)
Feed outputs from external indicators (RSI, custom oscillators, moving averages) into either layer
❓How It Works
Inputs are normalized (z-score, bounded, etc.) then smoothed (EMA, LinReg, etc.) in the order you choose. The result is clamped to 0–1 and passed through a multi-stop gradient engine for precise color mapping.
✨ What Makes It Original
While many indicators apply colors or smoothing, this script combines multi-stage normalization, adaptive smoothing, and a modular gradient rendering engine in a highly customizable dual-layer system. It’s built using proprietary functions from the SciQua suite that are not available in public libraries and allow for advanced visual encoding without relying on alerts, signals, or extra panes.
This makes it original in both design and execution—offering a visual-first approach with unique depth, clarity, and flexibility.
🔐 Why This Script Is Closed-Source
While the underlying functions are published in the open-source SciQua library, this indicator’s specific implementation, configuration architecture, and visual behavior are proprietary. It combines multiple library utilities into a dual-layer adaptive system that handles advanced gradient rendering, multi-stage normalization, and smoothing pipelines in a unique way.
The source is closed to protect the design logic, interface abstraction, and fine-tuned behaviors that make this indicator commercially valuable. The building blocks are open to the Pine community, but this assembled product is not meant for replication or redistribution.
How to Use It
1. Highlight Trend Strength
Source: RSI percentile
Setup: 200-bar look-back, mild smoothing
Result: Warm tones when momentum is peaking; cool when it’s fading. Use as a quick filter for entries in the direction of the trend.
2. Visualize Volatility Regimes
Source: ATR or True Range
Setup: Bounded normalization with tighter smoothing bar color off, bg color on.
Result: Background bands that shade when volatility spikes. Helps you avoid low-volatility breakouts or throttle position sizing in choppy markets.
3. Combine with Other Indicators
Source: Output of your custom indicator (e.g., a Keltner Band width)
Setup: Match normalization period to your strategy’s timeframe
Result: Bars colored by your own logic—no extra panes, just enhanced candles.
4. Background Only Heatmap
Turn off bar coloring and dial in semi-transparent background shades—keeps candles crisp while still giving you a context heat-map behind price.
StraddleThis is an indicator for straddle on Indian markets, with hedging/with out hedging.
You can se these with super trend and ema xover

EMA RSI Volume Signal Indicator - Realtime Alerts EMA RSI Volume Signal Indicator – Realtime Alerts
This intrabar indicator is designed to provide fast, actionable buy/sell signals by combining EMA crossovers, RSI momentum, and volume strength. It’s ideal for traders who want to catch momentum moves early with visual confirmation on the chart and real-time alerts.
🔍 What It Does
The script analyzes:
EMA Crossover: 5-period EMA crossing above/below 21 EMA for trend shift
RSI Direction: Upward or downward RSI movement for momentum confirmation
Volume Bias: More buying or selling volume (based on candle direction)
It fires a Buy signal when:
5 EMA is above 21 EMA (or crossover just occurred)
RSI is rising
Green candle (close > open)
Buy volume > Sell volume
It fires a Sell signal when:
5 EMA is below 21 EMA (or crossunder just occurred)
RSI is falling
Red candle (close < open)
Sell volume > Buy volume
🟢 Buy Signal
Appears when:
Trend is bullish (EMA9 > EMA21)
RSI is increasing
Candle is bullish
Buy volume > sell volume
🟩 Green circle below the candle
📢 Realtime alert: "Realtime Buy Signal!"
🔴 Sell Signal
Appears when:
Trend is bearish (EMA9 < EMA21)
RSI is decreasing
Candle is bearish
Sell volume > buy volume
🟥 Red circle above the candle
📢 Realtime alert: "Realtime Sell Signal!"
🧠 Realtime Trigger Logic
Signals are tracked intrabar (live bar)
Only one signal per bar is allowed (prevents clutter)
Ideal for scalping or short-term momentum trading
⚙️ How to Use
Add to chart (preferably 1–15 min timeframe)
Enable TradingView alerts on "Realtime Buy Signal!" and "Realtime Sell Signal!"
Use green/red dots as trade entries
Combine with stop-loss or other exit signals for risk control

Multi-TimeFrame Trend Dashboard- AK47: SMA, RSI, MACD, ADXMulti-Timeframe Trend Dashboard: SMA, RSI, MACD, ADX
This indicator provides a multi-timeframe dashboard to visually monitor the trend status of four popular technical indicators:
SMA (Simple Moving Average)
RSI (Relative Strength Index)
MACD (Moving Average Convergence Divergence)
ADX (Average Directional Index)
✅ Each row represents a timeframe (from 5m to 1M).
✅ Each column shows the current trend direction:
— 🔵 Bullish, 🔴 Bearish, ⚫ Neutral
✅ The color-coded background helps you quickly assess strength across timeframes and indicators.
🔧 Customizable settings:
Panel position
Trend colors
Moving average & indicator lengths
This tool is ideal for traders who rely on trend alignment across multiple timeframes to make high-confidence entries and exits.
