Haruto Developing VWAP & Value AreaDescription:
This indicator provides a comprehensive look at market dynamics by calculating a developing Volume-Weighted Average Price (VWAP) and its corresponding standard deviation bands. Unlike a fixed VWAP that only appears at the end of a period, this "developing" version updates on each bar, offering real-time insight into the current session's average traded price.
This tool is designed for traders who use intraday data to analyze market sentiment and identify key levels of support and resistance as they form. The standard deviation bands create a "value area," helping you to quickly visualize where the majority of trading volume is concentrated relative to the weighted average price.
Key Features:
Developing VWAP: The core VWAP line is calculated cumulatively and updates with each new bar throughout the session.
Customizable Timeframe: Choose the session period that fits your trading style, including Daily, Weekly, Monthly, Quarterly, or Yearly VWAP.
Standard Deviation Bands: Automatically plots standard deviation bands above and below the VWAP, forming a dynamic "value area." You can customize the multiplier for these bands.
Previous Period Levels: For crucial context, the indicator can display the final VWAP and value area levels from the previous period. These historical levels often act as significant support or resistance in the current session.
Clean & Clear Visualization: Uses clean lines and subtle fills to make the current and previous period levels easy to distinguish without cluttering your chart.
How to Use:
Identify the Trend: Observe whether the price is trading above or below the developing VWAP to gauge the intraday trend bias (bullish or bearish).
Spot Value: The area between the standard deviation bands represents the session's "value area." Prices inside this zone are considered to be at a "fair" value, while prices outside may indicate overbought or oversold conditions.
Find Key Levels: Use the previous period's VWAP and band edges as potential targets or areas of support and resistance. A rejection from or acceptance around these levels can provide powerful trading signals.
This indicator is a powerful tool for volume and price analysis, helping traders stay aligned with the market's flow throughout any given session.
Indicators and strategies

Dynamic Multi Oscillators Dashboard 4.2MOD: Dynamic Multi-Oscillator Dashboard
Short Summary
The Dynamic Multi-Oscillator Dashboard (MOD) is an all-in-one momentum and trend analysis tool designed to cut through the noise of using dozens of separate indicators. It aggregates signals from a comprehensive suite of classic oscillators and trend-following metrics into a clear, weighted scoring system for bullish, bearish, and neutral sentiment.
More than just a dashboard, MOD is a fully adaptive system. It intelligently adjusts its own parameters based on the chart's timeframe and its sensitivity based on real-time market volatility and trend strength, providing a truly dynamic view of market momentum.
Key Features
Advanced Scoring System: The indicator calculates a Bull, Bear, and Neutral score every bar based on a weighted combination of signals. This provides a constant, quantifiable measure of market sentiment.
Comprehensive Oscillator Suite: It incorporates signals from RSI, Stochastic, MACD, Awesome Oscillator (AO), ADX, DeMarker, Williams %R, True Strength Index (TSI), and Chaikin Money Flow (CMF).
Automatic Timeframe Adaptation: The indicator automatically detects if you are on a scalping, intraday, swing, or directional (long-term) timeframe and applies a unique, optimized set of parameters for each. This eliminates the need for manual retuning.
Dynamic Volatility Adjustment: Using the ATR, the indicator adjusts its signal thresholds in real-time. In high volatility, it requires stronger signals to avoid noise. In low volatility, it becomes more sensitive to catch moves early.
Adaptive Weighting for Market Regimes: The script identifies whether the market is in a strong trend or a ranging state. It then automatically increases the importance of trend-following components (like MACD) in a trend and range-bound oscillators (like Stochastic) in a range.
Built-in Divergence Detection: Automatically scans for regular and hidden bullish/bearish divergences on all major oscillators, a powerful tool for spotting potential reversals. The score for divergences is given a higher weight.
Multi-Lookback Dashboard: The clean and intuitive dashboard shows you the Bull, Bear, Neutral, and Divergence status for the current bar, as well as for two user-defined lookback periods (e.g., 2 bars ago and 5 bars ago), allowing you to see momentum developing over time.
Advanced Signal Confirmation: The scoring logic includes sophisticated inputs like Volume Confirmation, bonuses for signals occurring near key Market Structure (pivots), MACD Histogram "ticks", and the angle of the Stochastic %K line.
Fully Customizable Alerts: Create alerts for strong momentum, shifts in momentum (Net Strength crossing its signal line), or transitions from neutral to a trend (Net Strength crossing the zero line).
How to Use This Indicator
There are two primary components to watch: the Dashboard and the Net Strength plot.
1. The Dashboard
The dashboard gives you a snapshot of market sentiment.
Percentages (%): Look for one sentiment gaining dominance. A Bull % rising while the Bear % is falling indicates strengthening bullish conviction.
Net Strength Score: This is the raw Bull Score - Bear Score. A positive and rising value is bullish; a negative and falling value is bearish.
Divergence: This row will instantly tell you if any of the enabled oscillators are showing a Bullish or Bearish divergence, which is often a leading indicator of a reversal.
2. The Net Strength Plot
This plot visualizes the Net Strength score as an oscillator.
Zero Line Cross: When the Net Strength plot crosses above the zero line, it signals that bullish momentum is now outweighing bearish momentum. A cross below zero signals the opposite.
Signal Line Cross: A crossover of the Net Strength line and its signal line (the teal moving average) is an earlier indication of a potential shift in momentum, similar to a MACD crossover.
Background Color: A green background highlights a very strong bullish reading, while a red background highlights a very strong bearish reading, based on your alert thresholds.
Strategy: Look for Confluence
The true power of this tool comes from finding confluence. A high-probability setup occurs when multiple signals align. For example:
A strong bullish setup: The Bull % on the dashboard is high and rising, a "Bull" divergence appears, and the Net Strength plot crosses above its signal line from a low level.
Customization and Settings
Timeframe Automation: You can disable this to manually tune all parameters, or you can adjust the minute-thresholds to define your own trading styles.
Alerts & Weights: This is the engine room. You can change the weights for MACD, Divergences, Crossovers, and more to tailor the scoring algorithm to your personal trading strategy.
Divergence Options: You can enable/disable divergence detection for each oscillator individually to reduce noise or focus on your favorites.
Dashboard Display: Change the position of the dashboard and the lookback periods to fit your charting style.
---
Support the Author:
If you find this indicator helpful and wish to support its future development, you can do so by donating here. Your support is greatly appreciated!
Support via PayPal: paypal.me
---
Disclaimer: This indicator is a tool for market analysis and should not be considered financial advice. All trading involves risk. Please use proper risk management and test any new tool thoroughly before using it in a live trading environment. Past performance is not indicative of future results.

Solimano15MThis indicator uses SMAs and TDIs. It plots some SMAs and shark fin symbols on the chart. It fires buy and sell signals filtered by SMAs.


CPR + PDH/PDL + VWAP with TC/BC, EMA & SupertrendCPR + PDH/PDL + VWAP with TC/BC, EMA & SupertrendCPR + PDH/PDL + VWAP with TC/BC, EMA & Supertrend

Rpaid Killzone Breakout v3.6Final Indicator Title: Rapid Killzone Break & HTF Levels
Overview
Welcome to the Rapid Killzone Break & HTF Levels, an all-in-one trading toolkit designed for precision and context. This indicator was built to solve a common problem for day traders: how to combine a precise, lower-timeframe (LTF) entry model with the essential context of higher-timeframe (HTF) levels.
This tool is founded on a session-based breakout strategy, leveraging the volatility and liquidity generated during specific market hours (the "Killzones"). It then layers critical HTF support and resistance levels onto your chart, allowing you to make more informed trading decisions without ever needing to switch timeframes.
Whether you trade Forex, Gold, or major Indices, this indicator provides a comprehensive framework for identifying high-probability breakout opportunities.
The Core Strategy
The methodology is a powerful three-step process based on session liquidity and qualified breakouts:
The Killzone Range: The indicator first identifies the high and low established during a specific, high-volatility trading session (e.g., the first hour of London or New York). This range acts as a pool of liquidity. The core idea is that the market will often seek to "sweep" or run the liquidity resting above the session high or below the session low.
The Qualified Breakout: This is not just any breakout strategy. A valid entry signal only appears when price closes decisively outside the Killzone range with significant momentum. To ensure the quality of the signal, the breakout must meet several user-defined criteria:
The Killzone must have a minimum pip range.
The breakout candle must have a strong body-to-wick ratio.
The breakout must be accompanied by a spike in volume.
Higher Timeframe Confluence: A breakout is more likely to succeed if it aligns with the HTF narrative. This indicator plots the previous higher-timeframe candle's high and low directly onto your chart. These levels act as powerful magnets for price or as formidable support/resistance zones. A breakout on the LTF that targets the HTF previous high is a much higher-probability setup than one trading directly into it.
Key Features
📊 DST-Aware Killzones: Automatically adjusting session boxes for London and New York. The timezones are fully configurable (e.g., Europe/London, America/New_York) and automatically handle Daylight Saving Time changes so you never have to manually adjust them.
📈 Killzone Pivots: Automatically draws the High, Low, and a dotted Midpoint from each Killzone session, acting as key intraday levels.
🏛️ Higher Timeframe (HTF) Levels: Plots the previous HTF candle's High and Low as dashed lines on your chart, providing critical context for support, resistance, and targets.
🕯️ HTF Mini-Candles: Displays a visual summary of the last three HTF candles on the right side of your chart, so you can see the HTF trend at a glance.
⏰ Custom Vertical Timestamps: Up to three configurable vertical lines with labels to mark key events like other session opens (e.g., "Sydney Open").
🎛️ Advanced Breakout Filters: Fine-tune your signals with filters for minimum Killzone range, minimum candle body percentage, and volume spikes. (Important: The volume filter requires a data feed that provides real volume, such as OANDA, FXCM, or futures/stock data).
✅ Dynamic Entry Advice Table: After a signal, a table provides a suggested entry technique (e.g., "50% retrace to signal candle") based on how far price has moved from the breakout level.
📋 Killzone Range Stats Table: A clean table shows the current and average pip range for both the London and New York sessions, helping you gauge current volatility.
🛠️ Fully Customizable: Nearly every visual element can be toggled on/off or have its color and style changed to suit your personal chart theme.
How to Use This Indicator
This tool is designed to provide a clear, step-by-step workflow for your trading sessions.
Setup: In the settings, choose your desired Reference Timeframe (e.g., 240 for 4-Hour). Configure your Killzone session times and colors.
Context is King: Before the session begins, take note of where price is in relation to the dashed HTF High/Low lines. Is price consolidating below the previous HTF low? A breakout might target it. Is price approaching the HTF high? This could be a take-profit area or a point of resistance.
Wait for the Range: Allow the London or New York Killzone (the colored box) to form completely.
Anticipate the Breakout: Once the session box is closed, the indicator is now hunting for a valid breakout.
Validate the Signal: When a "Long" or "Short" label appears, this is your entry signal. Check the Info-Box data (RSI, volume, candle body %) to confirm the strength of the move.
Manage the Trade: Use the Killzone pivots and the HTF High/Low lines as potential areas to manage your trade, take partial profits, or identify a final target. Check the Entry Advice table for ideas on refined entries if you miss the initial move.
Applicable Markets
This strategy is most effective on instruments known for their session-based volatility. It has been tested and works exceptionally well on:
Forex Majors: EUR/USD, GBP/USD, etc.
Gold: XAU/USD
Indices: NASDAQ 100 (NQ100), S&P 500 (SPX500)
It is best used on lower timeframes (such as the 5-minute or 15-minute chart) for trade execution.


🤖🧠 ALGO Sniper🤖🧠 How the Script Works
The ALGO Sniper Indicator is a powerful trend-following tool designed to identify high-probability trading opportunities with precise buy and sell signals. Built on Pine Script v5, it leverages advanced trend detection and risk management features to enhance trading decisions. Below are the key mechanics of the script:
1. Advanced Trend Detection: Utilizes a smoothed range algorithm and the proprietary Algo Sniper filter to identify market trends, ensuring accurate trend direction analysis.
2. Candle-Close Signals: Generates buy and sell signals only after candle confirmation (barstate.isconfirmed), eliminating lag and ensuring reliable entries.
3. Sideways Market Filter: Includes a "No Signal in Sideways Market" option to avoid false signals during low-volatility, range-bound conditions.
4. Dynamic Stop-Loss: Offers both manual (ATR-based) and auto (20-40 pips) stop-loss options, allowing users to manage risk effectively.
5. Flexible Take-Profit: Supports manual (user-defined pips) and auto (300-800 pips) take-profit settings for customizable profit targets.
6. Visual Clarity: Plots clear buy/sell signals with "STRONG BUY" and "STRONG SELL" labels, along with dashed stop-loss and entry lines for easy trade monitoring.
7. Customizable Inputs: Provides user-friendly inputs for scan range, observation period, stop-loss offset, line colors, and thicknesses to tailor the indicator to individual preferences.
8. Alert System: Includes alert conditions for buy, sell, and take-profit events, enabling users to stay informed about market opportunities.
9. Volatility Adjustment: Adapts to market conditions using a smoothed range multiplier, ensuring robust performance across different assets and timeframes.
10. Non-Repainting Logic: Signals are generated post-candle close, preventing repainting and providing dependable trade setups.

Liquidity Sweep Strategy v2 - Fixed Close LabelsThe Liquidity Sweep Strategy v2 is designed to detect stop-loss hunting behavior, commonly seen in institutional trading. It capitalizes on false breakouts beyond recent swing highs or lows (liquidity zones), which are followed by sharp reversals.
This strategy is particularly effective during high-volume liquidity grabs when markets trigger stop-loss clusters and then reverse direction — a phenomenon often referred to as a liquidity sweep or stop hunt

ABC + Liquidity Trendlines Combined# ABC + Liquidity Trendlines Combined Indicator
## Overview
This comprehensive technical analysis tool combines advanced pattern recognition with dynamic liquidity zone detection to provide traders with high-probability entry and exit signals. The indicator integrates ABC harmonic pattern analysis with intelligent trendline breakout detection, creating a powerful multi-dimensional trading system.
## Key Features
### ABC Pattern Recognition System
- **Automated ZigZag Detection**: Identifies significant price swings using configurable period settings
- **Fibonacci-Based ABC Patterns**: Detects classic ABC retracement patterns with customizable Fibonacci levels (default 38.2% - 61.8%)
- **Error Rate Tolerance**: Built-in flexibility to accommodate market noise and imperfect patterns
- **Visual Pattern Marking**: Clear A, B, C labels with connecting lines for easy pattern identification
### Dynamic Liquidity Trendlines
- **Adaptive Trendline Generation**: Automatically draws support and resistance trendlines based on pivot highs and lows
- **Liquidity Zone Visualization**: Filled areas between parallel trendlines showing institutional liquidity zones
- **Real-time Trendline Updates**: Lines extend dynamically as new price data becomes available
- **Breakout Detection**: Immediate identification of trendline violations with visual alerts
### Trend Cloud System
- **Multi-Timeframe Moving Averages**: Incorporates 4 SMAs and 2 EMAs for comprehensive trend analysis
- **Dynamic Trend Cloud**: Color-coded cloud that visually represents market sentiment and trend strength
- **Trend Direction Filter**: Helps filter ABC signals based on overall market direction
### Advanced Signal Generation
- **ABC Entry Signals**: Precise entry points when ABC patterns complete near trend cloud support/resistance
- **Liquidity Breakout Alerts**: Immediate notification when price breaks through established liquidity zones
- **Confluence-Based Filtering**: Signals are generated only when multiple conditions align
- **Stochastic Confirmation**: Additional momentum confirmation using modified stochastic oscillator
## Signal Types
### ABC Signals (Small Triangles)
- **Green Triangle Up**: ABC long signal - Price completes ABC pattern with bullish confluence
- **Red Triangle Down**: ABC short signal - Price completes ABC pattern with bearish confluence
### Liquidity Breakout Signals (Large Triangles)
- **Blue Triangle Up**: Bullish liquidity breakout - Price breaks above resistance trendline
- **Red Triangle Down**: Bearish liquidity breakout - Price breaks below support trendline
## Configuration Options
### ABC Settings
- **ZigZag Period**: Sensitivity of swing detection (2-50)
- **Fibonacci Levels**: Customizable max/min retracement levels
- **Error Rate**: Tolerance for pattern imperfection (0-30%)
- **Pattern Display**: Toggle ABC pattern visibility and persistence
### Liquidity Settings
- **Pivot Period**: Lookback period for trendline calculation
- **Padding Distance**: Space between parallel trendlines
- **Color Customization**: Separate colors for bullish/bearish zones
- **Breakout Alerts**: Toggle for breakout signal display
### Trend Cloud
- **Moving Average Lengths**: Four SMA and two EMA period settings
- **Source Selection**: Choose price input for moving average calculations
- **Cloud Visualization**: Toggle trend cloud display with custom colors
## Best Practices
### Entry Strategies
1. **ABC Confluence**: Enter when ABC signals align with trend cloud direction
2. **Liquidity Breaks**: Trade breakouts with volume confirmation when available
3. **Multi-Timeframe**: Use higher timeframe trend cloud for directional bias
### Risk Management
- Place stops beyond pattern completion points for ABC trades
- Use trendline reclaim levels as stop loss for breakout trades
- Consider position sizing based on signal strength and confluence
### Market Conditions
- **Trending Markets**: Focus on ABC signals in trend direction
- **Range Markets**: Emphasize liquidity breakout signals
- **High Volatility**: Increase error rate tolerance for pattern recognition
## Alert System
The indicator provides comprehensive alert notifications for:
- ABC long and short signal generation
- Liquidity trendline breakouts (both directions)
- Pattern completion events
- Trend cloud direction changes
This indicator is designed for traders who appreciate the combination of harmonic pattern analysis with modern liquidity concepts, providing a robust framework for identifying high-probability trading opportunities across multiple timeframes and market conditions.

水印This custom indicator allows you to add a watermark to your TradingView charts, offering a straightforward way to label or brand your chart images. Whether you want to mark your charts for personal use, sharing, or copyright protection, this indicator provides a flexible and easy-to-use solution.
TG:https://t.me/BTC_133333

Multi-Timeframe EMA Overlay [Smoothed Approximation]in.tradingview.com This indicator displays Exponential Moving Averages (EMAs) from multiple timeframes (5m, 15m, 1H, 4H, 1D) on a single chart, regardless of your current timeframe.
HOW IT WORKS
You choose a base EMA length (e.g., 20).
The script calculates equivalent lengths for other timeframes (e.g., for a 1H EMA while on a 1-minute chart: 20 × 60 = 1200 length).
These adjusted EMAs are then computed and plotted — giving a continuous, smooth curve rather than a stepped line.
KEY FEATURES
🟪 5m, 🟦 15m, 🟩 1H, 🟧 4H, 🟥 1D EMAs.
🧠 Smooth approximation — good for visual trend tracking without step lag.
🎛️ Toggle visibility for each timeframe EMA independently.
📈 Uses
Trend Confirmation:
Aligning short-term trades with higher timeframe trends (e.g., go long only when 15m & 1H EMAs are trending up).
Confluence Zones:
Price action near multiple EMA levels from different timeframes can indicate strong support/resistance zones.
Entry Filters:
Avoid trades against dominant higher timeframe trends.
Example: On a 5m chart, only go long if price > 1H EMA.
Reversal Watch:
EMA convergence or crossovers across timeframes can signal potential trend shifts.

Beginner Friend (Beware of operator)Beginner Friend (Beware of operator) : A Statistical Approach to Enhancing Your Trading Strategy based on moving averages.
these indicator is purly for beginner only not for professional.
Moving averages (MAs) are one of the most popular tools used by traders and investors to smooth out price data and identify trends in the financial markets. While they may seem simple on the surface, moving averages are rooted in statistical analysis and offer powerful insights into price behavior over time. In this article, we will break down the concept of moving averages from a statistical viewpoint, explore different types of MAs and their benefits, and discuss how they can be effectively used in trading and market analysis.
The core idea behind a moving average is to capture the central tendency of a price over time, providing a clearer picture of the market’s overall direction. By averaging the price over a period, it helps traders see the general trend without being distracted by the noise of daily market volatility.
Indicator tells the 3 golden rules for beginner to became successfull
1. NEVER SELL ITM
2. REVERSAL PROHIBITED
3. TRADE SMALL QUANTITY
Using Moving Averages for Market Analysis
Moving averages are not just for individual trades; they can also provide valuable insight into broader market trends. Traders and investors use moving averages to gauge the overall market sentiment. For example, if a major index like the S&P 500 is trading above its 200-day moving average, it is often considered a sign of a strong market.
On the contrary, if the index breaks below its 200-day moving average, it can signal potential weakness ahead. This is why long-term investors pay close attention to moving averages as part of their overall market analysis.

TJR's BOS strategy 2.0 (improved version)BOS STRATEGY for the break of structures in an uptrend or a downtrend. used well for identifying wether or not strucutre has been broken to th upside or downside

🚀Accurate Scalper A.I🚀This script is a comprehensive scalping tool combining multiple technical indicators and risk management features
Dashboard---> Displays key metrics (strategy, trend strength, volume, timeframe trends) in a customizable table
Signal Settings--->Adjust signal sensitivity (default: 6.29) and filters (e.g., ignore consolidation signals)
Trading Signals---> Three strategies generate buy/sell signals
Risk Management, Trend Visualization, Volume Profile, Identify Sideways Market
Support/Resistance & Order Blocks ---> Auto S/R: Dashed lines at pivot points, Order Blocks: Demand/supply zones (green/red boxes)
Auto Fibonacci Extension
Detects Trends (using Super trend)
Plots Extensions beyond swing highs/lows
Labels Key Levels (0.382, 0.618)

Pivot + Supports and ResistancesBot that automatically takes the high, low, and close of the previous day and gives three supports and three resistances

PE Bands w/ Persistent EPS ProxyThis Pine Script is a valuation overlay for any stock or index, built around the idea of tracking and projecting P/E (Price-to-Earnings) multiple bands using trailing EPS and a growth assumption. Here's a full breakdown:
🔍 Purpose:
To visualize price bands based on valuation multiples (like 16x, 18x, 20x, etc.) of forward EPS, estimated from actual reported EPS over the last 4 quarters.
🧱 Core Components:
✅ @version=6
Specifies the latest Pine Script version (v6), ensuring compatibility with the newest syntax.
✅ indicator(...)
Declares a chart overlay indicator titled 'PE Bands w/ Persistent EPS Proxy', meaning the plots will appear on top of the price chart.
1. 📈 Growth Assumption Input
pinescript
Copy
Edit
Growth = input.float(1.08, 'Growth')
User input for projected forward EPS growth (default: +8%). This models earnings growth from trailing 12 months to forward 12 months.
2. 🧮 Retrieve EPS Data
pinescript
Copy
Edit
epsRaw = request.earnings(syminfo.tickerid, earnings.actual, gaps = barmerge.gaps_off)
Uses the built-in request.earnings() function to fetch actual EPS.
Works with any symbol that supports earnings data.
barmerge.gaps_off ensures EPS only shows on report bars (not filled in between).
3. 🧠 Persistent Memory for Last 4 EPS Values
pinescript
Copy
Edit
var float eps1 = na
...
if not na(epsRaw)
eps4 := eps3
eps3 := eps2
eps2 := eps1
eps1 := epsRaw
Implements a shift register: keeps track of the last 4 quarterly EPS values, so it can compute a full TTM (trailing 12-month) EPS even though epsRaw only updates quarterly.
4. 📊 Trailing 12-Month EPS
pinescript
Copy
Edit
epsTTM = na(eps1) or na(eps2) or na(eps3) or na(eps4) ? na : eps1 + eps2 + eps3 + eps4
Sums the most recent 4 quarters to get a TTM earnings proxy.
If any value is still na, the result is na.
5. 🔮 Forward EPS Estimation
pinescript
Copy
Edit
fwdEPS = epsTTM * Growth
Projects forward EPS using a growth multiplier (1.08 = +8%).
You could customize this to vary over time (e.g., macro-modelled growth).
6. 📐 Valuation Bands
pinescript
Copy
Edit
pe16 = fwdEPS * 16
...
pe24 = fwdEPS * 24
Calculates price levels the stock/index would be trading at under different valuation multiples of forward EPS.
These become bands: 16x, 18x, 20x, etc.
7. 📉 Plot Bands
pinescript
Copy
Edit
plot(pe16, ...)
...
plot(pe24, ...)
Draws horizontal or sloped bands that reflect valuation ranges.
If SPX is above the 22x or 24x band, you might consider the market overvalued.
If it’s near 16x, potentially undervalued (depending on forward EPS quality).
✅ Summary:
This is a dynamic, earnings-based valuation overlay for use on equity or index charts. It uses:
Real EPS data (as it gets reported)
Persistent memory to calculate trailing 12M EPS
Growth modeling to estimate forward EPS
Price targets for different forward P/E multiples

[DEM] Sequential Signal (With Backtesting) Sequential Signal (With Backtesting) is designed to generate buy and sell signals based on a modified Sequential counting methodology. It also includes a comprehensive backtesting framework to evaluate the historical performance of these signals. The indicator overlays directly on the price chart, plotting signals and displaying performance statistics in a table.

CNCRADIO talked GPT into Watching the YouTube!Referred GPT to the youtube channel and produced PINE script with no errors first try, followed some prompts and this is the result.

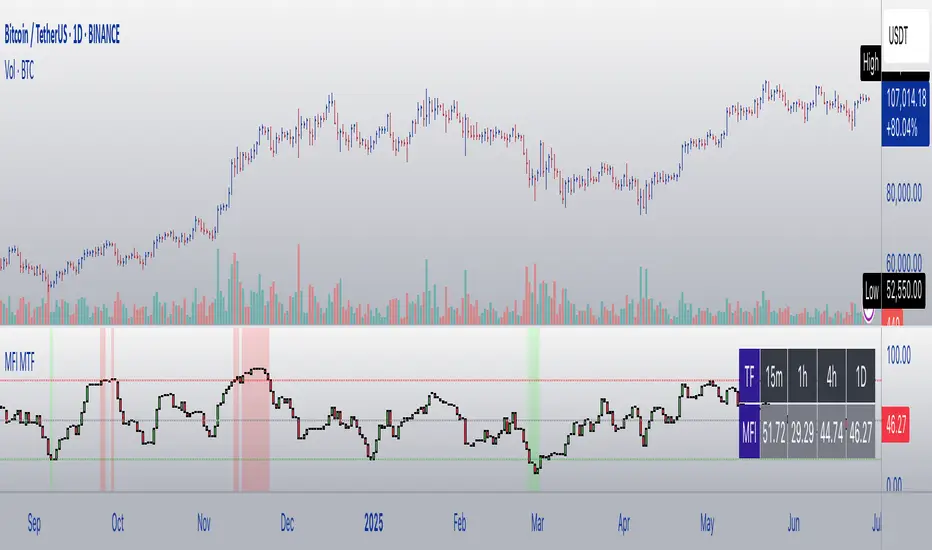
MFI Candles MTF TableMFI Candles + Multi-Timeframe Table | by julzALGO
This open-source script visualizes the Money Flow Index (MFI) in a new format — as candles instead of a traditional oscillator line. It provides a clean, volume-driven view of momentum and pressure, ideal for traders seeking more actionable and visual cues than a typical MFI plot.
What Makes It Unique:
• Plots "MFI Candles" — synthetic candles based on smoothed MFI values using a selected timeframe (default: 1D), giving a new way to read volume flow.
• Candles reflect momentum: green if MFI rises, red if it falls.
• Background turns red when MFI is overbought (≥ 80) or green when oversold (≤ 20).
Multi-Timeframe Strength Table:
• Displays MFI values from 15m, 1h, 4h, and 1D timeframes — all in one dashboard.
• Color-coded for quick recognition: 🔴 Overbought, 🟢 Oversold.
• Values are smoothed with linear regression for better clarity.
Custom Settings:
• MFI calculation length
• Smoothing factor
• Candle source timeframe
• Toggle table and OB/OS background
How to Use:
- Use MFI Candles to monitor momentum shifts based on money flow.
- Use the Multi-Timeframe Table to identify when multiple timeframes align — helpful for timing entries and exits.
- Watch the background for extreme conditions (OB/OS) that may signal upcoming reversals or pressure exhaustion.
Happy Trading!
Darvas Box Short Squeeze Strategy//@version=5
strategy("Darvas Box Short Squeeze Strategy", overlay=true)
// Inputs for the Darvas Box
darvasLength = input(20, title="Darvas Box Length")
riskRewardRatio = input(3, title="Risk to Reward Ratio")
riskAmount = input(100, title="Risk Amount ($)")
// Calculate the highest high and lowest low for Darvas Box
var float highLevel = na
var float lowLevel = na
var float darvasHigh = na
var float darvasLow = na
var bool inBox = false
if (high >= ta.highest(high, darvasLength) )
highLevel := high
inBox := true
if (low <= ta.lowest(low, darvasLength) )
lowLevel := low
inBox := false
if (inBox)
darvasHigh := highLevel
darvasLow := lowLevel
// Short Squeeze Condition: Significant upward movement with high volume
shortSqueezeCondition = (close > darvasHigh and volume > ta.sma(volume, 20))
// Entry logic for shorting on resistance
if (shortSqueezeCondition and close >= darvasHigh)
strategy.entry("Short", strategy.short)
// Long entry on major support (if price breaches below darvasLow)
if (close <= darvasLow)
strategy.entry("Long", strategy.long)
// Risk and Reward Levels
var float longTakeProfit = na
var float longStopLoss = na
var float shortTakeProfit = na
var float shortStopLoss = na
if (strategy.position_size > 0) // For Long position
longTakeProfit := strategy.position_avg_price * (1 + riskRewardRatio / 1)
longStopLoss := strategy.position_avg_price - (riskAmount / strategy.position_size)
if (strategy.position_size < 0) // For Short position
shortTakeProfit := strategy.position_avg_price * (1 - riskRewardRatio / 1)
shortStopLoss := strategy.position_avg_price + (riskAmount / (strategy.position_size))
// Exit logic
if (strategy.position_size > 0)
strategy.exit("Take Profit Long", from_entry="Long", limit=longTakeProfit, stop=longStopLoss)
if (strategy.position_size < 0)
strategy.exit("Take Profit Short", from_entry="Short", limit=shortTakeProfit, stop=shortStopLoss)
// Plotting levels for visualization
plot(longTakeProfit, color=color.green, style=plot.style_cross, title="Long Take Profit")
plot(longStopLoss, color=color.red, style=plot.style_cross, title="Long Stop Loss")
plot(shortTakeProfit, color=color.green, style=plot.style_cross, title="Short Take Profit")
plot(shortStopLoss, color=color.red, style=plot.style_cross, title="Short Stop Loss")

Kill Zones (EST 24hr, Custom Colors + Legend)Asian,London, New York Sessions Indicator shows high volume time zones on every time frame for futures and forex

Support, Resistance and Tests with Pivot Volume [SRLDA]Transform Your Technical Analysis with "Support, Resistance and Tests with Pivot Volume "
If you're looking for a professional indicator designed to take your trading to the next level, meet Support, Resistance and Tests with Pivot Volume , developed by Sardinha Risonha Lda (SRLDA).
Why is this indicator different?
Unlike standard tools that only draw static lines, this indicator automatically detects pivot highs and lows and evaluates their strength based on real volume. You get a dynamic, living analysis that evolves with the market.
How does it work?
Pivot detection: Identifies significant highs and lows using configurable bars to the left and right.
Volume capture: Records volume at each pivot to evaluate market conviction.
Volume analysis: Compares pivot volume to the 20-bar moving average volume (SMA). Levels are classified as WEAK, MEDIUM, or STRONG.
Dynamic styling: Line thickness and color adapt to strength. Labels show classification and formatted volume (K or M).
Retest feedback & trend change cues: When price retests a line, it changes style (e.g., dashed) and color to signal possible reversals or confirmations — perfect for spotting trend shifts in real time.
What do you get?
✅ Automatic support and resistance detection.✅ Strength classification for smarter decisions.✅ Visual cues with adaptive styles and colors.✅ Real-time updated labels with volume info.✅ Confirmation on trend changes through line style updates.
Who is it for?
Day traders and swing traders who want to avoid false breakouts.
Investors needing volume confirmation for entries.
Technical analysts who love clean, dynamic visuals.
100% customizable
✔️ Choose line style (solid, dashed, dotted).✔️ Adjust base thickness and max active lines.✔️ Toggle labels on/off easily.
Seamless with TradingView
Built with Pine Script v5 and fully optimized for TradingView. Start in seconds.
Take your edge further
Don’t just see levels — understand and react to them. With SRLDA, you know which zones truly matter and when a trend might shift.
⚡ Ready to trade smarter? Get it now and transform your market approach.
