OI Open Interest Explosion + RSI Pullback Entries🚀 DrScalpLove OI Explosion (Core Exchanges, All USD/USDT/USDC) + RSI Pullback
Welcome to the official #DrScalpLove Open Interest Explosion indicator—your advanced momentum filter for crypto scalping and trend trading!
Features:
• Aggregated Open Interest: Sums up OI across Binance, OKX, Kraken, and BitMEX, covering all major pairs: USDT, USD, and USDC.
• OI Explosion Detection: Identifies “explosive” OI moves with three configurable spike detection algorithms (SMA, EMA, Percentile Rank)—pick your favorite and backtest!
• RSI Pullback Entries: Built-in RSI retest logic for high-probability mean reversion and trend-continuation signals.
• Exchange/Pair Data Table: Instantly see which exchanges and pairs are currently providing data for your chart.
• All calculations on main chart. Minimal, no-nonsense, no repaint, built for 1–5min and higher timeframes.
• Perfect for Copy Trading & Professional Scalpers: Join #DrScalpLove momentum traders or copy my trades directly (see link below)!
⸻
How to Use
1. Add to your chart.
2. Select your exchanges and OI aggregation logic in the indicator settings.
3. Use OI Explosion signals as a trend filter or trigger; combine with RSI Pullback for entry timing.
4. Check the status table to see live data availability for each exchange/pair.
5. Copy my trades or use as a watchlist filter to boost your win rate and avoid choppy zones.
⸻
👑 Follow, Like & Copy Trade
• Copytrade me on Binance: www.binance.com
• X (Twitter): @DrScalpLove2140
• Website: www.drscalplove.com
• Hashtag: #DrScalpLove
⸻
Disclaimer
This indicator is for educational purposes only. Crypto trading involves risk; always manage your exposure and never trade with money you can’t afford to lose.
⸻
**If you find value, smash that Like, Follow, and share with fellow traders!
Let’s scalp the future—together.
#DrScalpLove**
Trend Analysis

Enhanced Volume Profile Strategy [Lite]🔍 Enhanced Volume Profile Strategy
A smart and nimble trading strategy that blends Volume Profile theory with classic trend and volatility filters — optimized for intraday breakout and pullback setups.
🧠 Key Concepts:
Volume Profile (Lite Simulation): Approximates volume distribution over a fixed period to identify:
VPOC (Volume Point of Control): Price level with the highest traded volume
VAH / VAL (Value Area High / Low): Range containing a customizable % of total volume
Breakout + Pullback Logic: Enters on breakout above VAH or below VAL, after a healthy pullback confirms the move
Trend Filtering: Uses SMA to align trades with the dominant trend
Volume Confirmation: Optional volume spike check to avoid low-liquidity traps
ATR-Based Trailing Stop: Dynamically adapts exit levels based on recent volatility
⚙️ Strategy Inputs:
Volume Profile Period: How many bars to analyze for volume distribution
Value Area %: Range around VPOC containing the majority of volume
ATR & MA Periods: Configure volatility and trend filters
Pullback Bars: Fine-tune confirmation before entry
Volume Confirmation Multiplier: Demand a surge in volume before acting
✅ Entries:
Long: Breaks above VAH, confirms with volume and trend, then pulls back and reclaims breakout level
Short: Breaks below VAL, confirms with volume and trend, then pulls back and breaks again downward
❌ Exits:
ATR-based trailing stop protects gains and adapts to market movement
📈 Plots:
VPOC: Orange
VAH: Red
VAL: Green
This "Lite" version is lightweight and highly customizable — perfect for traders who want to balance volume insights with price action and trend-following logic. Ideal for futures, forex, and crypto on lower timeframes.

Support and Resistance with SL and TrendOverview :
This script builds a complete chart overlay using dynamic pivot-based Support/Resistance zones, adaptive to market volatility. It incorporates SL estimation, visual trade context cues, and trendline structure—all derived from a smart ATR-normalized engine. Ideal for discretionary traders who want structural confluence, rapid proximity alerts, and volatility-aware S/R levels.
Core Components:
> 1. Volatility-Normalized Pivot Detection: The script computes pivot highs/lows using an adaptive strength mechanism, which scales dynamically based on ATR fluctuations. This ensures S/R levels are responsive to shifting volatility regimes, rather than being fixed or rigid.
> 2. Horizontal S/R Line Generation: Pivot highs form resistance zones (Red), while pivot lows map support zones (Green). Lines can be extended or set to expire after a fixed bar duration for clean charting.
> 3. SL Labeling (Structure-Based): Each S/R level is labeled with a corresponding “Sell SL” or “Buy SL”, computed using the extreme structure from the previous 10 bars. This provides a fast visual cue for risk management placement.
> 4. Proximity Highlighting: When price comes within a % threshold (user-defined) of any active S/R level, triangle markers appear—Red near Resistance, Green near Support. These cues reduce screen-watching and help time entries.
> 5. Trendline Projection from Pivot Pairs: Dashed trendlines connect the two most recent swing highs and swing lows respectively, offering additional structure awareness—perfect for spotting compression zones, flags, and swing breaks.
Configuration & Usage Guide:
> 🛠 Inputs You Can Adjust:
Base Swing Strength: Controls how "wide" the pivots are
ATR Sensitivity: Amplifies or softens the impact of volatility on pivot strength
Proximity %: Sets how close price must be to trigger the triangle markers
Extend Lines: Whether S/R lines extend infinitely right or expire after set bars
How to Use It:
Add to chart and configure settings to match your trading style (scalping = higher sensitivity).
Watch for price nearing plotted zones. Triangle markers appear when proximity criteria are met.
Use the SL labels below/above the zones to anchor stop placement relative to structure.
Observe dashed trendlines to define the current local range or trend structure.
Ideal For:
Scalpers wanting S/R zones with trigger cues
Swing traders needing volatility-adaptive structure
Manual traders seeking precise stop placement and trend context
Those who dislike repainting and want structure-driven logic


Master [Trade Snipers]✅ How It Works
The Master indicator is a custom-developed trend and signal tool based on a modified range filter algorithm, specifically designed for clarity, non-repainting signals, and actionable trade execution.
🔧 1. Custom Adaptive Range Filter (Original Logic)
At its core is a custom-built filter that adapts to price volatility. Unlike standard MAs or public-domain range indicators, this version:
(1) Uses a double-smooth EMA logic on absolute price changes.
(2)Multiplies the range by an Impact Factor, giving a dynamic width.
(3) Applies a custom filter algorithm that limits noise and locks on trend movement.
This logic was modified from the concept of range-based filters, but entirely re-engineered to serve trend-following and TP triggering.
🟩 2. Visual Trend Zones (Upper/Lower Lines)
The filtered value generates two dynamic lines:
(1)One above the filter
(2)One below the filter
These create a color-filled “trend tunnel”, making it easy to identify:
(3)🔵 Uptrend (blue fill)
(4)🔴 Downtrend (red fill)
(5)🟡 Sideways market (no fill or neutral color)
These visual cues allow instant identification of market direction without reading complex data
📈 3. Smart Buy/Sell Signals (Confirmed, Non-Repainting ✅)
(1)🚀 Smart Buy is triggered when a confirmed uptrend begins (filter shifts upward with a
new confirmation).
(2)🔻 Smart Sell appears at the start of a confirmed downtrend.
(3)Sideways filters out choppy signals, reducing whipsaws.
✅ All signals are confirmed only after the candle closes (barstate.isconfirmed is used), meaning:
🔒 No repainting or false previews — 100% reliable on live charting.
💰 4. Take Profit System (Unique Utility)
This indicator tracks the entry price after a signal, and auto-detects when a Take Profit level
(in pips) is reached.
(1)💰 Book Profit alert is triggered above/below the candle.
(2)Helps secure gains without relying on external bots or platforms.
🔔 5. Real-Time Alerts Included
All alerts are built-in for automation:
(1)🚀 Smart Buy
(2)🔻 Smart Sell
(3)💰 Book Profit (Buy/Sell)

HustleDrop ORB StrategyThe HustleDrop ORB is the official breakout box indicator for SOL/USDT — designed specifically for the HustleDrop strategy using 5-minute candles.
⏰ Sessions:
• 09:00–09:30 CET (Morning)
• 00:15–00:45 CET (Night)
💡 How to use:
1. Add this indicator to your chart
2. Wait for the box to be drawn automatically
3. Enter trade when a 5-minute candle **closes outside** the box
4. Trade only on SOL/USDT
5. Follow HustleDrop TP/SL rules
This is the same box we use for live signals and bot automation.
🚀 Get signals or learn more:
t.me

Adaptive Trend Filter🔒 IAFL Adaptive Trend Filter – Smart Entry & Exit Tool for All Traders
Description:
This invite-only indicator is designed to offer precision-based trade entries and exits using adaptive trend logic. Rather than simply combining common tools, it integrates market strength and directional confirmation in a customized framework optimized for intraday, swing, and positional trading.
🎯 What Sets This Apart?
🔹 Dynamic Strategy Modes
Traders can toggle between three distinct behavioral modes based on their trading style—intraday, swing, or positional—each optimized to adjust internal decision thresholds, not just display values.
🔹 Filtered Entry System
Buy and Sell signals are only generated when multiple custom-defined trend conditions align, significantly reducing noise and false signals. This makes it particularly useful during volatile or consolidating markets.
🔹 Smart Risk Tools
Includes a built-in module to automatically generate Stop Loss and Take Profit levels using real-time market dynamics or predefined risk-reward rules. This helps users manage trades more consistently.
🔹 Trade Insight Panel
A non-intrusive on-chart panel gives users key details such as:
Latest signal
Stop loss & target levels
Current position status and live P/L
🔹 Non-Repainting Logic
Signals are confirmed and stable. There’s no repainting once a bar closes, ensuring that what users see is what actually happened.
🧠 How to Use It
Ideal for traders who want signal confirmation before acting
Suitable for equities, indices, crypto, or commodities
Can be combined with price action, volume, or multi-timeframe analysis
Works best on trending instruments with adequate volatility
This is a tool for discretionary trading, not an auto-entry system. It’s meant to complement a trader's strategy, not replace it.
❌ No Promotions or External Links
No website links
No contact info
No ads or offers
It is solely intended to provide value to serious traders who are looking for a thoughtful entry-filtering system.
🔐 Why Invite-Only?
This system is not just a mashup of public indicators. It involves:
Proprietary entry/exit logic
Dynamic threshold adjustments under the hood
User interface tools designed for better clarity and discipline
It’s invite-only to ensure that it's used responsibly and by users who understand how to integrate it into their process.

Intradayscanner - Institutional InterestIntradayscanner - Institutional Interest is an indicator designed to help you spot whether your selected asset is showing stronger or weaker price action compared to the broader market. It uses rolling price changes adjusted by average true range to highlight when an instrument may be gaining or losing institutional attention compared to general market moves. Use it to spot potential leadership, confirm trends, or gauge momentum shifts.


JS Elite XAUUSD Scalper v1.0📈 Elite XAUUSD Scalper v1.0 – A Premium Scalping Strategy for Gold
The Elite XAUUSD Scalper v1.0 is a high-performance scalping strategy designed to capture quick price movements in the XAUUSD (Gold) market. Built with precision and optimized for intraday trading, this strategy uses a combination of Fast & Slow EMAs, ATR (Average True Range), and advanced Order Block & Liquidity Sweep logic to identify profitable opportunities in real-time.
Key Features:
Multiple Confluences: The strategy utilizes the HTF Trend Filter, RSI, Volume Analysis, and Order Blocks to ensure that trades are placed with the highest probability of success.
Real-time Entry & Exit Signals: Automated long and short entries with Take-Profit (TP), Stop-Loss (SL), and Partial TP levels for precise risk management.
Trailing Stop: Automatically trails stop-loss to lock in profits as the price moves in your favor, ensuring that you can ride the trend while protecting your gains.
Alerts: Get notified of long and short signals in real-time via TradingView alerts. Never miss a trade!
Strategy Logic:
Trend Filter: The strategy incorporates a higher time-frame (HTF) trend filter, which ensures that trades are taken only in the direction of the overall trend.
Scalping Precision: The Fast EMA (4) and Slow EMA (14) ensure timely entry and exit points, while the ATR (2) adds an extra layer of risk management, ensuring your stops are intelligently placed.
Risk-to-Reward: Set to a 2:1 reward-to-risk ratio, with an option for partial take-profit at 1.2x RR, allowing you to lock in gains while letting the trade run.
Order Block & Liquidity Sweep: Identifies price levels with high institutional interest, ensuring your trades align with market liquidity.
Ideal For:
Intraday Traders: This strategy is perfect for traders looking to capitalize on fast, small price movements in XAUUSD (Gold).
Scalpers & Swing Traders: It’s designed to handle quick moves while minimizing drawdown and securing profits during market swings.
Why Choose Elite XAUUSD Scalper v1.0?
Customizable: Adjust the strategy's risk parameters, trailing stop, and partial TP to suit your trading style and risk tolerance.
Highly Accurate: Combining the Fast & Slow EMAs, ATR, and order block logic, this strategy increases the accuracy of your trades, helping you stay ahead of market movements.
Automated: Set it and forget it — the strategy takes care of entries, exits, and risk management, freeing you to focus on other markets or activities.
🚀 Start Trading with Elite XAUUSD Scalper v1.0 Today!
Unlock the power of high-frequency scalping with the Elite XAUUSD Scalper v1.0. Get access to the strategy and start trading smarter today.
💬 Disclaimer
This strategy is for educational purposes only. Past performance is not indicative of future results. Use this strategy at your own risk and ensure that you fully understand its features and risks before trading with real capital.
🎯 Ready to Take Your Trading to the Next Level?
Access the strategy via Invite-Only access on TradingView
Enjoy personalized, automated, and highly accurate signals that can boost your trading potential
Start making consistent profits with a professional trading approach

BTC D-AccumulatorBTC D-Accumulator — Adaptive Bitcoin Macro Accumulation System
Overview
BTC D-Accumulator is an advanced Bitcoin-focused accumulation detection and signal generation tool designed for daily timeframe traders and long-term investors. Its main purpose is to help users identify potential macro accumulation zones and market cycle resets with high statistical confidence. By combining on-chain metrics (NUPL, CVDD), adaptive EMA-based trend filtering, and a proprietary math-driven crossover logic, it delivers clear accumulation signals classified into four levels of conviction: AI BUY, BUY, Low Accumulation, and Risky Accumulation.
What It Does
BTC D-Accumulator analyzes BTC price action and market health across several complementary dimensions:
1. On-Chain Valuation Metrics - NUPL (Net Unrealized Profit/Loss) is used to gauge sentiment extremes and potential undervaluation. CVDD (Cumulative Value Days Destroyed) defines probabilistic long-term floor values based on historical spending behavior.
2. Macro Crossover Logic - A custom math-based moving average crossover system dynamically adjusts its periods to the timeframe. Detects major market cycle resets or restarts (AI SELL / AI BUY signals).
3. Dynamic EMA Filtering - Evaluates BTC’s position relative to EMA50, EMA100, and EMA200 to confirm broader trend context and filter signals.
4. Momentum and Mean Reversion Conditions - RSI and smoothed RSI values ensure that signals are only triggered when the market is statistically oversold. A custom dual-line momentum engine measures directional bias and deceleration.
5. Visual Labels & Alerts - Each signal is displayed with a label directly on the chart (AI BUY, BUY, or arrows for other accumulation levels). Built-in alerts allow traders to be notified instantly when accumulation signals appear.
How It Works
BTC D-Accumulator uses the combined state of these components to classify price action into four actionable accumulation signals:
1. AI BUY – Strongest macro accumulation signal triggered by a proprietary math crossover and confirmed by other criteria.
2. BUY – High-probability accumulation signal combining on-chain undervaluation and momentum exhaustion.
3. GREEN ARROW – Moderate accumulation signal triggered when BTC is below major EMAs and shows volatility compression.
4. ORANGE ARROW – Early accumulation attempt during oversold conditions but with less confluence; higher risk.
Result: Signals only appear when multiple valuation, momentum, and trend filters align, improving selectivity and reducing noise.
How To Use It
1. Confirm the Context: Always ensure you are viewing BTC pairs (BTCUSD, BTCUSDT, BTCUSDC) on the Daily timeframe. Assess the overall market trend and sentiment before taking action.
2. Act According to the Signal Type:
-- AI BUY: Indicates a major cycle reset or strong accumulation opportunity; suitable for scaling into long-term positions.
-- BUY: Signals a statistically favorable zone for adding exposure with high confidence.
-- Low Accumulation: Moderate conviction entry; consider using partial position size.
-- Risky Accumulation: Early accumulation in potentially unstable market conditions; requires tighter risk control.
3. Manage Exposure: Use stop losses and scale entries progressively rather than committing all capital at once. Combine with your macro thesis and portfolio objectives.
Why It Is Unique
1. Integrates on-chain valuation metrics (NUPL, CVDD) with adaptive EMA filtering and math-based cycle detection.
2. Designed specifically for Bitcoin daily charts, avoiding false signals in other pairs or timeframes.
3. Provides four clearly classified accumulation signals, enabling flexible strategy deployment across different conviction levels.
4. Includes real-time visual labels and alerts for improved situational awareness and automation.
Apply Risk Management
Never rely exclusively on signals without understanding Bitcoin’s broader context. Maintain a clear risk/reward plan, diversify across entries, and size positions responsibly.
Timeframe Selection
Optimized for the Daily timeframe only. Using lower or higher timeframes will disable or distort signals.
Asset Selection
Only applicable to BTCUSD/BTCUSDT/BTCUSDC
Best Suited For
Bitcoin investors, swing traders, and position traders who want a systematic framework to identify macro accumulation opportunities.
Important Notes
The signals generated by BTC D-Accumulator are intended to support informed decisions, not to replace independent analysis. While the indicator incorporates advanced on-chain and price-based metrics, it does not guarantee outcomes. Use all information in combination with your trading plan and risk management practices.
License
This indicator was developed by the ProphetAlgoAI team. Its use is restricted to TradingView under a private, invite-only agreement. Redistribution or usage outside TradingView is strictly prohibited without explicit authorization from the ProphetAlgoAI team.

BB + Supertrend with One-Time 100 USD Half ExitUse these signals for 4 hour and above time frames. It shows an exit of 50% of your trade after 100 pip profit. This is best for crypto. For gold I would suggest exit half the position at 50 pips profit. You can then trail the rest of manage manually.
Works best with crypto and gold

Divergence Detector📈 Divergence Detector – Pine Script Indicator
🎯 Purpose
Detects bullish/bearish divergences between price and:
📊 WaveTrend
📈 RSI (Relative Strength Index)
📉 Stochastic Oscillator
Divergences signal potential trend reversals.
✨ Features & Advantages
✅ Multi-Indicator Analysis – checks 3 oscillators simultaneously.
✅ Customizable Filters – min. divergence length & distance between signals.
✅ Clean Visuals – colored lines + labels for clarity.
✅ Alerts – get notified when divergences appear.
⚙️ Settings
🔹 General
Pivot Lookback (15) – pivot detection depth.
Max Bars to Look Back (50) – limits divergence search range.
Min Divergence Length (6) – avoids noise.
Min Distance Between Signals (10) – prevents signal overcrowding.
🔹 Indicators
WaveTrend:
Channel Length (9)
Average Length (12)
MA Length (3)
RSI: Length (14)
Stochastic:
Length (14)
K Smoothing (3)
🔹 Colors & Style
Bullish (🟢 Green)
Bearish (🔴 Red)
Line Width (2)
Show Labels (ON/OFF)
📖 How to Use?
1. Bullish Divergence 🟢:
Price → Lower Lows | Oscillator → Higher Lows = Potential UP reversal.
2. Bearish Divergence 🔴:
Price → Higher Highs | Oscillator → Lower Highs = Potential DOWN reversal.
3. Alerts – enable in TradingView.
⚠️ Limitations
❌ False signals – not every divergence leads to a reversal.
❌ Lagging – pivot-based detection delays signals.
❌ Chart clutter – too many lines if unchecked.
💡 Pro Tips
✔ Combine with support/resistance levels.
✔ Avoid using alone on low timeframes (M1-M15).
✔ Adjust settings for your trading style (e.g., increase Min Divergence Length for daily charts).
❤️ Support This Project
If you find this indicator helpful and want to support future developments, donations are appreciated at:
USDT (TRC20): THFFLEZSpTqapYF6oj9rmuTCQVUXvuz7VS
Your generosity helps maintain and improve free indicators for the trading community!

Optimus Prime X SignalsOptimus Prime X Signals - TradingView Indicator Description
Overview
The Optimus Prime X Signals is a sophisticated, customizable technical analysis indicator designed for the TradingView platform. It combines three widely used technical indicators—Average True Range (ATR), Exponential Moving Average (EMA), and Relative Strength Index (RSI)—to generate actionable buy and sell signals. By integrating these indicators, the script provides traders with a versatile tool to identify potential entry and exit points in various market conditions. The indicator is displayed as an overlay on the price chart, with clear visual cues for signals, including labeled markers and candlestick color changes.
This indicator is suitable for traders of all experience levels, offering flexible configuration options to tailor signal generation to specific trading strategies and timeframes. It also includes built-in alert conditions, enabling seamless integration with TradingView’s alert system for real-time notifications.
Features
1. Multi-Indicator Signal Generation
The indicator combines signals from ATR-based support/resistance levels, EMA price deviations, and RSI overbought/oversold conditions. Traders can enable or disable each indicator’s contribution to the final signal, allowing for a highly customizable approach.
2. Visual Feedback
* Buy and Sell Labels: Green "Buy" labels appear below the price bar, and red "Sell" labels appear above the price bar when signals are triggered.
* Candlestick Coloring: Candlesticks turn white when a buy or sell signal is generated, providing an immediate visual cue.
* Overlay Design: The indicator integrates directly with the price chart, ensuring a clutter-free and intuitive user experience.
3. Flexible Configuration
Each indicator component (ATR, EMA, RSI) has its own configuration group in the settings panel, allowing traders to:
* Adjust periods, multipliers, and thresholds.
* Specify custom timeframes for each indicator.
* Enable or disable individual indicators for signal generation.
4. Alert Integration
The script includes two alert conditions:
* Buy Signal: Triggered when all enabled conditions (ATR, EMA, RSI) align for a bullish signal.
* Sell Signal: Triggered when all enabled conditions align for a bearish signal.
These alerts can be configured within TradingView to notify traders via email, SMS, or other supported methods.
Configuration Options
Support/Resistance Configuration (ATR)
* Use (ATR) Support/Resistance for Signals: Enable or disable ATR-based signals (default: enabled).
* ATR Period: Set the lookback period for calculating the ATR (default: 5).
* ATR Multiplier: Define the multiplier applied to the ATR value to calculate support and resistance levels (default: 0.5).
* ATR Timeframe: Specify the timeframe for ATR calculations (default: Daily, "D").
The ATR is used to establish dynamic support (price below the last close minus ATR * multiplier) and resistance (price above the last close plus ATR * multiplier) levels. A buy signal is generated when the price falls below the support level, and a sell signal is generated when the price rises above the resistance level.
EMA Configuration
* Use EMA for Signals: Enable or disable EMA-based signals (default: enabled).
* EMA Period: Set the lookback period for the EMA calculation (default: 50).
* EMA (%) Distance: Define the percentage distance from the EMA to create upper and lower bands (default: 0.5%).
* EMA Timeframe: Specify the timeframe for EMA calculations (default: chart timeframe).
The EMA component generates a buy signal when the price falls below the lower EMA band (EMA * (1 - distance/100)) and a sell signal when the price rises above the upper EMA band (EMA * (1 + distance/100)).
RSI Configuration
* Use RSI for Signals: Enable or disable RSI-based signals (default: enabled).
* RSI Period: Set the lookback period for RSI calculation (default: 14).
* RSI Overbought Level: Define the RSI level for overbought conditions (default: 70).
* RSI Oversold Level: Define the RSI level for oversold conditions (default: 30).
* RSI Timeframe: Specify the timeframe for RSI calculations (default: chart timeframe).
The RSI component triggers a buy signal when the RSI falls below the oversold level and a sell signal when it rises above the overbought level.
How It Works
Signal Logic
The indicator generates buy and sell signals based on the combined conditions of the enabled indicators:
* Buy Signal: Triggered when all enabled conditions are met (e.g., price below ATR support, price below EMA lower band, and RSI below oversold level).
* Sell Signal: Triggered when all enabled conditions are met (e.g., price above ATR resistance, price above EMA upper band, and RSI above overbought level).
If any indicator is disabled, its condition is ignored in the signal calculation, allowing traders to focus on specific indicators or combinations.
Visual and Alert Output
* When a signal is triggered, a label ("Buy" or "Sell") is plotted on the chart, and the corresponding candlestick is colored white.
* Alerts are available for integration with TradingView’s notification system, ensuring traders can act promptly on signals.
Usage Instructions
1. Add to Chart: Add the "Optimus Prime X Signals" indicator to your TradingView chart.
2. Configure Settings: Access the indicator’s settings to customize ATR, EMA, and RSI parameters, including periods, multipliers, thresholds, and timeframes.
3. Enable Alerts: Set up alerts for buy and sell signals through TradingView’s alert system for real-time notifications.
4. Analyze Signals: Monitor the chart for labeled signals and candlestick color changes to identify potential trading opportunities.
Notes for Traders
* Customization: Adjust the settings to align with your trading style, market, and timeframe. For example, increase the ATR multiplier for wider support/resistance zones or adjust the RSI levels for more or less frequent signals.
* Timeframe Flexibility: Use different timeframes for ATR, EMA, and RSI to capture multi-timeframe trends and improve signal accuracy.
* Risk Management: Always combine this indicator with proper risk management strategies, as no indicator guarantees profitable trades.
* Backtesting: Test the indicator on historical data to evaluate its performance in your chosen market and timeframe.
Limitations
* The indicator may generate false signals in choppy or sideways markets, as it relies on trend and momentum-based conditions.
* Signals are based on historical data and may lag in fast-moving markets.
* The maximum number of labels displayed is set to 500 to comply with TradingView’s limitations.
Conclusion
The Optimus Prime X Signals indicator is a powerful and user-friendly tool for traders seeking to combine ATR, EMA, and RSI signals into a cohesive trading strategy. Its customizable settings, clear visual feedback, and alert integration make it suitable for both novice and experienced traders. By providing flexibility in configuration and timeframe selection, it empowers users to adapt the indicator to various markets and trading styles.
For support or feedback, please contact the script author through TradingView’s messaging system.

AYSUWelcome to AYSU Trading Access.
I’m a full-time futures trader and the creator of the AYSU Indicator, an invite-only strategy developed through extensive market research and real-time testing.
My work focuses on building tools that help traders better visualize market structure, anticipate directional bias.
Here, I share updates and resources related to the AYSU system and other personal trading projects.
Note: All scripts are for educational purposes only and do not constitute financial advice.
— Invite-only scripts are manually approved based on availability and trader compatibility.

Momentum Trail Oscillator [AlgoAlpha]🟠 OVERVIEW
This script builds a Momentum Trail Oscillator designed to measure directional momentum strength and dynamically track shifts in trend bias using a combination of smoothed price change calculations and adaptive trailing bands. The oscillator aims to help traders visualize when momentum is expanding or contracting and to identify transitions between bullish and bearish conditions.
🟠 CONCEPTS
The core idea combines two methods. First, the script calculates a normalized momentum measure by smoothing price changes relative to their absolute values, which creates a bounded oscillator that highlights whether moves are directional or choppy. Second, it uses a trailing band mechanism inspired by volatility stops, where bands adapt to the oscillator’s volatility, adjusting the thresholds that define a shift in directional bias. This dual approach seeks to address both the magnitude and persistence of momentum, reducing false signals in ranging markets.
🟠 FEATURES
The momentum calculation applies Hull Moving Averages and double EMA smoothing to price changes, producing a smooth, responsive oscillator.
The trailing bands are derived by offsetting a weighted moving average of the oscillator by a multiple of recent momentum volatility. A directional state variable tracks whether the oscillator is above or below the bands, updating when the momentum crosses these dynamic thresholds.
Overbought and oversold zones are visually marked between fixed levels (+30/+40 and -30/-40), with color fills to highlight when momentum is in extreme areas. The script plots signals on both the oscillator pane and optionally overlays markers on the main price chart for clarity.
🟠 USAGE
To use the indicator, apply it to any symbol and timeframe. The “Oscillator Length” controls how sensitive the momentum line is to recent price changes—lower values react faster, higher values smooth out noise. The “Trail Multiplier” sets how far the adaptive bands sit from the oscillator mid-line, which affects how often trend state changes occur. When the momentum line rises into the upper filled area and then crosses back below +40, it signals potential overbought exhaustion. The opposite applies for the oversold zone below -40. The plotted trailing bands switch visibility depending on the current directional state: when momentum is trending up, the lower band acts as the active trailing stop, and when trending down, the upper band becomes active. Trend changes are marked with circular symbols when the direction variable flips, and optional overlay arrows appear on the price chart to highlight overbought or oversold reversals. Traders can combine these signals with their own price action or volume analysis to confirm entries or exits.

Fair Value GapsFair Value Gaps Indicator
The Fair Value Gaps (FVG) Indicator is a sleek, lightweight tool designed to identify and display unfilled fair value price gaps on any chart and timeframe. It dynamically updates as price moves into gaps, shrinking the displayed area to show only the remaining unfilled portion until the gap is fully closed. With a user-friendly settings panel, traders can customize visuals to suit their style, including a minimalist version.
Features
When a valid FVG is detected through a three-candle pattern, a box appears, highlighting the precise gap range. As price enters the gap, the box adjusts to reflect the remaining unfilled area, and when fully filled, the gap is deleted, allowing new gaps to appear. The settings panel offers robust customization for a tailored experience.
Preset Styles :
Custom : Define your own color and zone extension settings. (Default)
Blue Boxes : Blue gaps with 85% transparency and zones extended to the right.
Minimalist Yellow : Yellow gaps with 75% transparency, confined to the original gap area on the candlestick.
Color : Change the gap color and transparency.
Extend FVG Zone : Enable or disable zone extension to the right.
Show Borders : Toggle subtle borders on or off for enhanced visibility.
Maximum FVGs Displayed : Change the number of gaps displayed on the chart.
Thank you for your interest in my work. I use these fair value gaps as part of my trade trigger for many of my trade entries almost every day. If you have any comments, bugs, or suggestions, please leave them here, or you can find me on Twitter or Discord.
@ ContrarianIRL
Open-source developer for over 25 years

Trend-Following + Mean Reversion StrategyThe hybrid logic seeks to enter trades in the direction of the dominant trend but only when the price becomes temporarily oversold or overbought. This improves entry precision and risk-reward.

RATE OF CHANGE ROLLING INTEGRALAdded an integral balance to the ROC subchart.
just tracks the balance of area back to the ROC length.

Mongoose Capital: DriftScope Alpha SignalsMongoose Capital: DriftScope Alpha Signals — Grover Tribute Edition
Author: The Real Mongoose
Inspired by: Alex Grover’s work on divergence-based signal design.
Overview
This indicator captures and visualizes BTC spot price drift relative to the top 6 U.S.-listed Bitcoin ETFs. It highlights actionable divergence opportunities that occur at U.S. ETF market open and helps identify when BTC is moving ahead or lagging behind institutional flows.
Designed for macro-aware crypto traders who want alpha edge from spot-vs-ETF inefficiencies.
Core Features
BTC Spot vs ETF Drift and Spread Analysis
Fade / Long Signals at U.S. ETF Market Open
Z-Score Normalization and Conviction Scaling
BTC1 Futures Overlay for Session Gap Context
Dynamic Bias Labeling: Neutral, Fade, or Long
Market Session-Aware Logic (weekday + hour filters)
Clean Data Window Signal Output for Manual Confirmation
How to Use
Load on a BTCUSD chart (Coinbase recommended).
Watch for signals in the Data Window:
"Fade ETF Open" = Potential short opportunity
"Long ETF Open" = ETF catching up to BTC spot; long bias
Best on intraday or 1D timeframes.
Combine with BTC1 Futures and ETF volume/sentiment.
Use confirmation from price structure, order flow, or MFO bias.
Methodology
Measures real-time price drift between BTC spot and top 6 ETFs
Computes z-score from the spread to normalize signal strength
Applies session filters: only triggers around ETF open windows
Adds BTC1 futures context for weekend/overnight gaps
Designed in the signal modeling spirit of Alex Grover
Purpose
Created to monitor how institutional flows (via ETFs) interact with real BTC demand. Identifies alpha windows where spot price leads or lags ETF behavior. Traders can fade extreme dislocations or ride momentum as ETF volume enters.
This is not a lagging oscillator — it’s a session-based, flow-aware signal model for the BTC macro era.
Attribution
Built by The Real Mongoose
Inspired by Alex Grover
Part of the Mongoose Capital signal suite

Base RSI Combo: CrossOverloadBasic RSI COMBO Indicator
🌎 Types of Signals & System Logic
• Ticker Signal🔻(small red and green arrows) — local signal on a specific asset. This is the most frequent type, capturing short-term shifts in demand/supply pressure.
• Market Signal ⬇️(blue bidirectional arrows)— derived from USDT.D dominance, alt weakness, and the liquidity vector.
💼 Basic ($15/month)
• Real-time signals
• From 7min TF
• Only Ticker + Market signals
• No alerts, no combo
• No webhook, no support

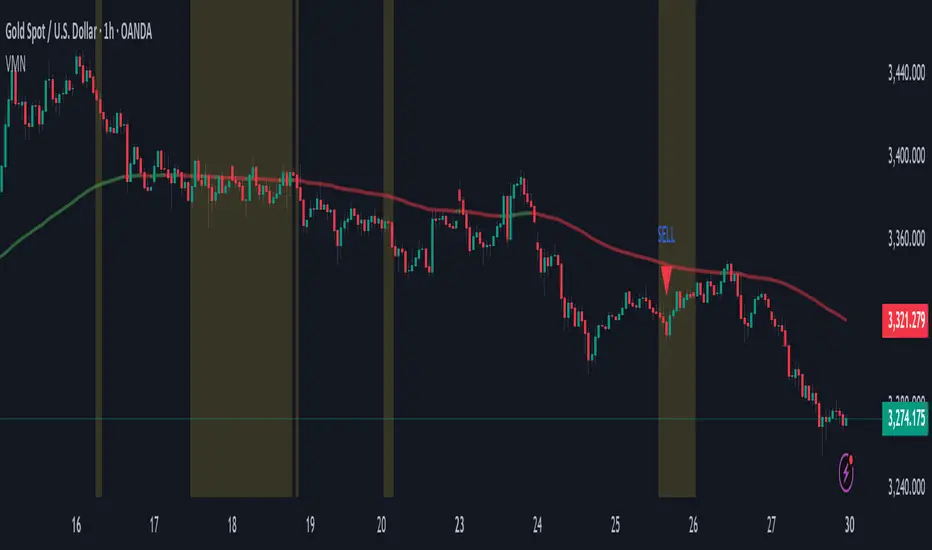
Volatility & Momentum Nexus (VMN)Volatility & Momentum Nexus (VMN)
This indicator was designed to solve a common trader's problem: chart clutter from dozens of indicators that often contradict each other. The Volatility & Momentum Nexus ( VMN ) is not just another indicator; it's a complete analysis system that synthesizes four essential market pillars into a single, clean, and intuitive visual signal.
The goal of VMN is to identify high-probability moments where a period of accumulation (low volatility) is about to erupt into an explosive move, confirmed by trend, momentum, and volume.
VMN analyzes the real-time confluence of four critical elements:
The Trend (The Main Filter): A 100-period Exponential Moving Average (EMA) sets the overall context. The indicator will only look for buy signals above this line (in an uptrend) and sell signals below it (in a downtrend). The line's color changes for quick visualization.
Volatility (Energy Accumulation): Using Bollinger Bands Width (BBW), the indicator identifies "Squeeze" periods—when the price contracts and builds up energy. These zones are marked with a yellow background on the chart, signaling that a major move is imminent.
Momentum (The Trigger): An RSI (Relative Strength Index) acts as the trigger. A signal is only validated if momentum confirms the direction of the breakout (e.g., RSI > 55 for a buy), ensuring we enter the market with force.
Volume (The Final Confirmation): No breakout move is credible without volume. VMN checks if the volume at the time of the signal is significantly higher than its recent average, adding a vital layer of confirmation.
Green Arrow (Buy Signal): Appears ONLY when ALL the following conditions are met simultaneously:
Price is above the 100 EMA (Bullish Trend).
The chart is exiting a Squeeze zone (yellow background on the previous bar).
Price breaks above the upper Bollinger Band.
RSI is above the buy threshold (default 55).
Volume is above average.
Red Arrow (Sell Signal): Appears ONLY when all the opposite conditions are met.
Do not treat signals as blind commands to trade. They are high-probability confirmations.
Look for signals near key Support/Resistance levels for an even higher success rate.
Always set a Stop Loss (e.g., below the low of the signal candle or below the lower Bollinger Band for a buy).
All parameters (EMA, RSI, Bollinger Bands lengths, thresholds, etc.) can be customized from the settings menu to adapt the indicator to any financial asset or timeframe.
Disclaimer: This indicator is a tool for educational and analytical purposes. It does not constitute and should not be interpreted as financial advice. Trading involves significant risk. Always perform your own analysis and backtesting before risking real capital.