Gold DynamicThis is a custom-made TradingView indicator designed to visualize "sequential price levels" based on a user-defined step value, dynamically centered around the current gold price. It draws horizontal lines at multiples of a chosen step value (e.g., 7) both above and below the current price.
Key Features:
Dynamic Price Levels: Lines are calculated relative to the live price, providing relevant support/resistance or structural levels for the current market context.
Customizable Step Value: Easily adjust the Sequence Step Value (e.g., 7, 10, 14) from the indicator settings to align with your trading theory.
Adjustable Line Count: Control the Number of Lines ABOVE Current Price and Number of Lines BELOW Current Price to show as many or as few levels as desired.
Extended Lines: Horizontal lines extend indefinitely to both the left (historical data) and right (future projection) for comprehensive visualization.
Clear Price Labels: Each line displays its exact price value, positioned at the far right of the chart for quick reference.
Customizable Appearance: Modify line color, width, and style (solid, dotted, dashed) to suit your charting preferences.
Exact Values: All displayed price labels are rounded to whole numbers for clear, precise visualization without decimal values.
This indicator is ideal for traders looking to apply a fixed-step price theory to their gold analysis.
Trend Analysis

Momentum Trail Oscillator [AlgoAlpha]🟠 OVERVIEW
This script builds a Momentum Trail Oscillator designed to measure directional momentum strength and dynamically track shifts in trend bias using a combination of smoothed price change calculations and adaptive trailing bands. The oscillator aims to help traders visualize when momentum is expanding or contracting and to identify transitions between bullish and bearish conditions.
🟠 CONCEPTS
The core idea combines two methods. First, the script calculates a normalized momentum measure by smoothing price changes relative to their absolute values, which creates a bounded oscillator that highlights whether moves are directional or choppy. Second, it uses a trailing band mechanism inspired by volatility stops, where bands adapt to the oscillator’s volatility, adjusting the thresholds that define a shift in directional bias. This dual approach seeks to address both the magnitude and persistence of momentum, reducing false signals in ranging markets.
🟠 FEATURES
The momentum calculation applies Hull Moving Averages and double EMA smoothing to price changes, producing a smooth, responsive oscillator.
The trailing bands are derived by offsetting a weighted moving average of the oscillator by a multiple of recent momentum volatility. A directional state variable tracks whether the oscillator is above or below the bands, updating when the momentum crosses these dynamic thresholds.
Overbought and oversold zones are visually marked between fixed levels (+30/+40 and -30/-40), with color fills to highlight when momentum is in extreme areas. The script plots signals on both the oscillator pane and optionally overlays markers on the main price chart for clarity.
🟠 USAGE
To use the indicator, apply it to any symbol and timeframe. The “Oscillator Length” controls how sensitive the momentum line is to recent price changes—lower values react faster, higher values smooth out noise. The “Trail Multiplier” sets how far the adaptive bands sit from the oscillator mid-line, which affects how often trend state changes occur. When the momentum line rises into the upper filled area and then crosses back below +40, it signals potential overbought exhaustion. The opposite applies for the oversold zone below -40. The plotted trailing bands switch visibility depending on the current directional state: when momentum is trending up, the lower band acts as the active trailing stop, and when trending down, the upper band becomes active. Trend changes are marked with circular symbols when the direction variable flips, and optional overlay arrows appear on the price chart to highlight overbought or oversold reversals. Traders can combine these signals with their own price action or volume analysis to confirm entries or exits.

Fair Value GapsFair Value Gaps Indicator
The Fair Value Gaps (FVG) Indicator is a sleek, lightweight tool designed to identify and display unfilled fair value price gaps on any chart and timeframe. It dynamically updates as price moves into gaps, shrinking the displayed area to show only the remaining unfilled portion until the gap is fully closed. With a user-friendly settings panel, traders can customize visuals to suit their style, including a minimalist version.
Features
When a valid FVG is detected through a three-candle pattern, a box appears, highlighting the precise gap range. As price enters the gap, the box adjusts to reflect the remaining unfilled area, and when fully filled, the gap is deleted, allowing new gaps to appear. The settings panel offers robust customization for a tailored experience.
Preset Styles :
Custom : Define your own color and zone extension settings. (Default)
Blue Boxes : Blue gaps with 85% transparency and zones extended to the right.
Minimalist Yellow : Yellow gaps with 75% transparency, confined to the original gap area on the candlestick.
Color : Change the gap color and transparency.
Extend FVG Zone : Enable or disable zone extension to the right.
Show Borders : Toggle subtle borders on or off for enhanced visibility.
Maximum FVGs Displayed : Change the number of gaps displayed on the chart.
Thank you for your interest in my work. I use these fair value gaps as part of my trade trigger for many of my trade entries almost every day. If you have any comments, bugs, or suggestions, please leave them here, or you can find me on Twitter or Discord.
@ ContrarianIRL
Open-source developer for over 25 years

Trend-Following + Mean Reversion StrategyThe hybrid logic seeks to enter trades in the direction of the dominant trend but only when the price becomes temporarily oversold or overbought. This improves entry precision and risk-reward.

RATE OF CHANGE ROLLING INTEGRALAdded an integral balance to the ROC subchart.
just tracks the balance of area back to the ROC length.

Mongoose Capital: DriftScope Alpha SignalsMongoose Capital: DriftScope Alpha Signals — Grover Tribute Edition
Author: The Real Mongoose
Inspired by: Alex Grover’s work on divergence-based signal design.
Overview
This indicator captures and visualizes BTC spot price drift relative to the top 6 U.S.-listed Bitcoin ETFs. It highlights actionable divergence opportunities that occur at U.S. ETF market open and helps identify when BTC is moving ahead or lagging behind institutional flows.
Designed for macro-aware crypto traders who want alpha edge from spot-vs-ETF inefficiencies.
Core Features
BTC Spot vs ETF Drift and Spread Analysis
Fade / Long Signals at U.S. ETF Market Open
Z-Score Normalization and Conviction Scaling
BTC1 Futures Overlay for Session Gap Context
Dynamic Bias Labeling: Neutral, Fade, or Long
Market Session-Aware Logic (weekday + hour filters)
Clean Data Window Signal Output for Manual Confirmation
How to Use
Load on a BTCUSD chart (Coinbase recommended).
Watch for signals in the Data Window:
"Fade ETF Open" = Potential short opportunity
"Long ETF Open" = ETF catching up to BTC spot; long bias
Best on intraday or 1D timeframes.
Combine with BTC1 Futures and ETF volume/sentiment.
Use confirmation from price structure, order flow, or MFO bias.
Methodology
Measures real-time price drift between BTC spot and top 6 ETFs
Computes z-score from the spread to normalize signal strength
Applies session filters: only triggers around ETF open windows
Adds BTC1 futures context for weekend/overnight gaps
Designed in the signal modeling spirit of Alex Grover
Purpose
Created to monitor how institutional flows (via ETFs) interact with real BTC demand. Identifies alpha windows where spot price leads or lags ETF behavior. Traders can fade extreme dislocations or ride momentum as ETF volume enters.
This is not a lagging oscillator — it’s a session-based, flow-aware signal model for the BTC macro era.
Attribution
Built by The Real Mongoose
Inspired by Alex Grover
Part of the Mongoose Capital signal suite

Base RSI Combo: CrossOverloadBasic RSI COMBO Indicator
🌎 Types of Signals & System Logic
• Ticker Signal🔻(small red and green arrows) — local signal on a specific asset. This is the most frequent type, capturing short-term shifts in demand/supply pressure.
• Market Signal ⬇️(blue bidirectional arrows)— derived from USDT.D dominance, alt weakness, and the liquidity vector.
💼 Basic ($15/month)
• Real-time signals
• From 7min TF
• Only Ticker + Market signals
• No alerts, no combo
• No webhook, no support

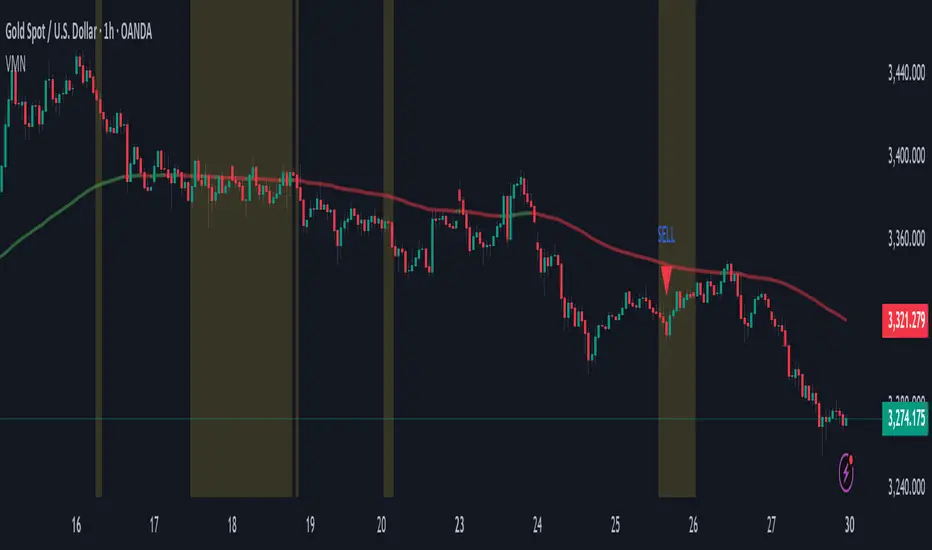
Volatility & Momentum Nexus (VMN)Volatility & Momentum Nexus (VMN)
This indicator was designed to solve a common trader's problem: chart clutter from dozens of indicators that often contradict each other. The Volatility & Momentum Nexus ( VMN ) is not just another indicator; it's a complete analysis system that synthesizes four essential market pillars into a single, clean, and intuitive visual signal.
The goal of VMN is to identify high-probability moments where a period of accumulation (low volatility) is about to erupt into an explosive move, confirmed by trend, momentum, and volume.
VMN analyzes the real-time confluence of four critical elements:
The Trend (The Main Filter): A 100-period Exponential Moving Average (EMA) sets the overall context. The indicator will only look for buy signals above this line (in an uptrend) and sell signals below it (in a downtrend). The line's color changes for quick visualization.
Volatility (Energy Accumulation): Using Bollinger Bands Width (BBW), the indicator identifies "Squeeze" periods—when the price contracts and builds up energy. These zones are marked with a yellow background on the chart, signaling that a major move is imminent.
Momentum (The Trigger): An RSI (Relative Strength Index) acts as the trigger. A signal is only validated if momentum confirms the direction of the breakout (e.g., RSI > 55 for a buy), ensuring we enter the market with force.
Volume (The Final Confirmation): No breakout move is credible without volume. VMN checks if the volume at the time of the signal is significantly higher than its recent average, adding a vital layer of confirmation.
Green Arrow (Buy Signal): Appears ONLY when ALL the following conditions are met simultaneously:
Price is above the 100 EMA (Bullish Trend).
The chart is exiting a Squeeze zone (yellow background on the previous bar).
Price breaks above the upper Bollinger Band.
RSI is above the buy threshold (default 55).
Volume is above average.
Red Arrow (Sell Signal): Appears ONLY when all the opposite conditions are met.
Do not treat signals as blind commands to trade. They are high-probability confirmations.
Look for signals near key Support/Resistance levels for an even higher success rate.
Always set a Stop Loss (e.g., below the low of the signal candle or below the lower Bollinger Band for a buy).
All parameters (EMA, RSI, Bollinger Bands lengths, thresholds, etc.) can be customized from the settings menu to adapt the indicator to any financial asset or timeframe.
Disclaimer: This indicator is a tool for educational and analytical purposes. It does not constitute and should not be interpreted as financial advice. Trading involves significant risk. Always perform your own analysis and backtesting before risking real capital.
Standart RSI Combo: CrossOverloadStandard RSI COMBO Indicator
!!! ONLY FOR CRYPTO ASSETS!!!
!!! Только для крипто-активов!!!
🌎 Types of Signals & System Logic
• Ticker Signal🔻(small red and green arrows) — local signal on a specific asset. This is the most frequent type, capturing short-term shifts in demand/supply pressure.
• Market Signal ⬇️(blue bidirectional arrows)— derived from USDT.D dominance, alt weakness, and the liquidity vector.
• COMBO Signal 🔽🔼 (large red and green arrows)— occurs when both above signals align. This is the strongest type.
⚙️ Standard ($25/month)
• Real-time signals
• From 1min TF
• Combo + Ticker + Market signals
• Basic webhook templates
• No support, no extras
• Alerts — respond fast to entry/exit signals
• Market Signal — gauge overall trend
• Custom Signals (Premium) — quickly add alerts for all signal types across unlimited tickers, no need to manually enter ticker names or timeframes. Especially useful when tracking many assets — activate once, and alerts will flow automatically.

headmapOverview
Advanced Price-Action Zones is a comprehensive, professional-grade indicator designed to automatically map and visualize the most critical historical price levels on your chart. Moving beyond simple lines, it renders these levels as dynamic, semi-transparent zones, providing an intuitive 'heatmap' of significant support, resistance, and potential liquidity areas.
This tool is built for traders who demand a clean, data-rich chart that adapts in real-time to market movements, with a fully customizable interface for personal tuning.
Core Features
Automated Multi-Timeframe Analysis: Automatically plots the high and low of the previous Daily, Weekly, Monthly, and 12-Hour sessions, forming the backbone of your structural analysis.
Heatmap-Style Visualization: Levels are displayed as colored zones rather than simple lines. This allows you to instantly spot areas of confluence where multiple historical levels overlap, indicating stronger S/R.
Dynamic Daily Highlighting: The most recent previous day's high/low is shown in a primary color (default: yellow). As a new day begins, these zones automatically fade to a distinct historical color (default: grey), keeping your focus on the most relevant and recent price action.
Intraday Liquidity Targets: Temporary 12-hour zones are plotted with "L. Shorts" and "L. Longs" labels, highlighting potential short-term reversal areas or stop-run targets. These zones automatically expire to keep the chart clean.
Daily Range Context: A subtle background fill visualizes the entire range of the previous trading day, extending into the current session to provide immediate context for breakouts or range-bound behavior.
Toggleable Volume Data: Get deeper insights with floating labels showing the volume on the bar that created a key Daily, Weekly, or Monthly level. This feature can be turned on or off in the settings.
Full Customization: Every color for every zone type, background, and text element is fully adjustable via the indicator's input menu.
On-Chart Informative Legend: A clean legend in the top-right corner explains the color-coding and the implied importance of each timeframe.
How to Interpret the Visuals
High-Timeframe Levels (Monthly/Red, Weekly/Orange): Use these major zones to identify significant market turning points, high-probability reversal areas, and logical take-profit targets for swing trades.
Mid-Timeframe Levels (Daily): The yellow zones (most recent) represent the immediate battlefield. A decisive move beyond this area can set the tone for the session. The grey zones provide a historical map of prior daily structures.
Short-Timeframe Levels (12-Hour/Blue): Treat these as intraday targets. They often represent areas where stop-losses and liquidations might be clustered, making them magnets for price in the short term.
Disclaimer & Technical Notes
Disclaimer: This tool is for educational and analytical purposes only and does not constitute financial advice or trade signals. All trading involves significant risk.
Technical Note on lookahead: This indicator correctly uses lookahead = barmerge.lookahead_on when requesting higher-timeframe data. This is the standard, industry-accepted method to ensure that a completed historical value (e.g., the previous day's high) is plotted consistently and accurately across all chart timeframes. It does not "repaint" in the conventional sense of changing past signals, but rather ensures data stability.
This is a protected, closed-source script.

Future is hereOverview
"Future is Here" is an original, multi-faceted Pine Script indicator designed to provide traders with a comprehensive toolset for identifying high-probability trading opportunities. By integrating volatility-based entry zones, trend-based price targets, momentum confirmation, dynamic support/resistance levels, and risk-reward ratio (RRR) calculations, this indicator offers a cohesive and actionable trading framework. Each feature is carefully designed to complement the others, ensuring a synergistic approach that enhances decision-making across various market conditions. This script is unique in its ability to combine these elements into a single, streamlined interface with clear visual cues and customizable alerts, making it suitable for both novice and experienced traders.
Key Features and How They Work Together
Volatility-Based Entry Zones
Purpose: Identifies overbought and oversold conditions using a volatility-adjusted moving average, helping traders spot potential reversal zones.
Mechanism: Utilizes a user-defined volatility length and multiplier to calculate dynamic overbought/oversold thresholds based on the standard deviation of price. Crossovers and crossunders of these levels trigger "Buy Zone" or "Sell Zone" labels.
Synergy: These zones act as the foundation for entry signals, which are later confirmed by momentum and trend filters to reduce false signals.
Trend-Based Price Targets
Purpose: Projects potential price targets based on the prevailing trend, giving traders clear objectives for profit-taking.
Mechanism: Combines a fast and slow moving average to determine trend direction, then calculates target prices using a multiplier of the price deviation from the slow MA. Labels display bullish or bearish targets when the fast MA crosses the slow MA.
Synergy: Works in tandem with entry zones and momentum signals to align targets with market conditions, ensuring traders aim for realistic price levels supported by trend strength.
Momentum Confirmation
Purpose: Validates entry signals by assessing momentum strength, filtering out weak setups.
Mechanism: Uses the momentum indicator to detect bullish or bearish momentum crossovers, labeling them as "Strong" or "Weak" based on a comparison with a smoothed momentum average.
Synergy: Enhances the reliability of buy/sell signals by ensuring momentum aligns with volatility zones and trend direction, reducing the risk of premature entries.
Dynamic Support/Resistance Levels
Purpose: Highlights key price levels where the market is likely to react, aiding in trade planning and risk management.
Mechanism: Detects pivot highs and lows over a user-defined lookback period, drawing horizontal lines for the most recent support and resistance levels (limited to two each for clarity). Labels mark these levels with price values.
Synergy: Complements entry zones and price targets by providing context for potential reversal or continuation points, helping traders set logical stop-losses or take-profits.
Buy/Sell Signals with Risk-Reward Ratios
Purpose: Generates precise buy/sell signals with integrated take-profit (TP), stop-loss (SL), and RRR calculations for disciplined trading.
Mechanism: Combines volatility zone crossovers, trend confirmation, and positive momentum to trigger signals. ATR-based TP and SL levels are calculated, and the RRR is displayed in labels for quick assessment.
Synergy: This feature ties together all previous components, ensuring signals are only generated when volatility, trend, and momentum align, while providing clear risk-reward metrics for trade evaluation.
Customizable Alerts
Purpose: Enables traders to stay informed of trading opportunities without constant chart monitoring.
Mechanism: Alert conditions are set for buy and sell signals, delivering notifications with the entry price for seamless integration into trading workflows.
Synergy: Enhances usability by allowing traders to act on high-probability setups identified by the indicator’s combined logic.
Originality
"Future is Here" is an original creation that distinguishes itself through its holistic approach to technical analysis. Unlike single-purpose indicators, it integrates volatility, trend, momentum, and support/resistance into a unified system, reducing the need for multiple scripts. The inclusion of RRR calculations directly in signal labels is a unique feature that empowers traders to evaluate trade quality instantly. The script’s design emphasizes clarity and efficiency, with cooldowns to prevent label clutter and a limit on support/resistance lines to maintain chart readability. This combination of features, along with its customizable parameters, makes it a versatile and novel tool for traders seeking a robust, all-in-one solution.
How to Use
Setup: Add the indicator to your TradingView chart and adjust input parameters (e.g., Volatility Length, Trend Length, TP/SL Multipliers) to suit your trading style and timeframe.
Interpretation:
Look for "Buy Zone" or "Sell Zone" labels to identify potential entry points.
Confirm entries with "Bull Mom" or "Bear Mom" labels and trend direction (Bull/Bear Target labels).
Use Support/Resistance lines to set logical TP/SL levels or anticipate reversals.
Evaluate Buy/Sell signals with TP, SL, and RRR for high-probability trades.
Alerts: Set up alerts for Buy/Sell signals to receive real-time notifications.
Customization: Fine-tune multipliers and lengths to adapt the indicator to different markets (e.g., stocks, forex, crypto) or timeframes.

[T] FVG Candles with Distance PriorityThis script will mark out historical FVG candles that are closest to where price is currently.
It will draw a box around the candle body at high/low and midpoint (CE) and extend the boxes right to current price.
The distance priority setting will mark historical FVGs closest to where price is currently at; for the max defined number of boxes.
The levels do not have an option to be marked as mitigated - as this indicator is intended for HTF charts, where these levels are considered "permanent" support and resistance levels.

Relative Strength Multi-Period
🔷 Relative Strength Multi-Period (vs Benchmark)
This indicator offers a powerful, customizable view of **relative strength (RS)** between the charted symbol and a benchmark (default: `NSE:NIFTY`). It's designed to help traders and analysts visually identify consistent outperformance or underperformance over multiple timeframes.
🧭 Key Features:
* 📈 **Multi-Timeframe RS Analysis**: Plots RS lines for three configurable periods (default: 21, 55, 123).
* ⚖️ **Benchmark Comparison**: Compare any symbol to a benchmark such as `NSE:NIFTY`, `SPX`, `BTCUSD`, or `BANKNIFTY`.
* 🟰 **Zero Line Reference**:
* RS > 0 → Symbol is outperforming the benchmark.
* RS < 0 → Underperforming.
* 🎨 **Smart Color Logic**:
* RS lines turn red when below zero and stay red until they cross back above — helping highlight persistent weakness.
🛠 Customization Options:
* ✅ Enable/disable RS lines individually.
* ✅ Select any benchmark symbol for comparison.
* ✅ Optional Moving Average on RS(21) to reduce noise.
* 🎛 MA period customizable (default: 10).
📊 Ideal Use Cases:
* Identifying **relative outperformers or laggards**.
* Supporting **sector rotation**, **momentum-based strategies**, or **trend confirmation**.
* Works across stocks, indices, cryptocurrencies, or forex pairs.
📌 Notes:
* This script is intended for use in the **indicator pane**, not on the main price chart.
* A separate overlay version can be used for candle-based visuals like EMA crossovers or signal markers.
⚠️ Disclaimer:
This script is for **educational and informational purposes only**. It does **not constitute financial advice or a buy/sell recommendation**. Always perform your own research and consult a licensed financial advisor before making trading decisions.

Dow Theory Trend IndicatorIdentifies bullish (Higher Highs/Lows) and bearish (Lower Highs/Lows) trends using Dow Theory principles, with dynamic volume confirmation.
Displays the current trend status ("Bull", "Bear", or "Neutral")

Entry DOTs (Stoch RSI)Entry DOTs (Stoch RSI) Indicator Manual
Overview
The Entry DOTs (Stoch RSI) indicator is a multi-timeframe Stochastic RSI visualization tool designed to provide quick visual analysis of market momentum across 8 different timeframes simultaneously. The indicator displays two rows of colored dots in the bottom-right corner of your TradingView chart, with each dot representing the Stochastic RSI value for a specific timeframe.
Visual Layout
The indicator displays 8 dots arranged in 2 rows of 4 dots each:
First Row (Top):
•
Dot 1: 1-minute timeframe
•
Dot 2: 3-minute timeframe
•
Dot 3: 5-minute timeframe
•
Dot 4: 15-minute timeframe
Second Row (Bottom):
•
Dot 5: 1-hour timeframe
•
Dot 6: 2-hour timeframe
•
Dot 7: 4-hour timeframe
•
Dot 8: 1-day timeframe
Color System
The dot colors represent the Stochastic RSI value using a gradient system:
•
Black (0%): Extremely oversold condition
•
Red (25%): Oversold condition
•
Orange (50%): Neutral/middle range
•
Yellow (75%): Overbought condition
•
Green (100%): Extremely overbought condition
Colors between these points are automatically interpolated using RGB color mixing, providing smooth transitions that accurately represent intermediate values.
Installation Instructions
1.
Open TradingView and navigate to your desired chart
2.
Click on the "Pine Editor" tab at the bottom of the screen
3.
Delete any existing code in the editor
4.
Copy and paste the provided Pine Script code
5.
Click "Add to Chart" button
6.
The indicator will appear in the bottom-right corner of your chart
Settings Configuration
Access the indicator settings by right-clicking on the indicator and selecting "Settings".
Display Settings
Display Option: Choose between two display modes:
•
"Dots Only": Shows only the colored dots
•
"Dots and Values": Shows dots with numerical Stochastic RSI values below each dot
Colors Group
Customize the color scheme for different Stochastic RSI levels:
•
Stochastic RSI 0% Color: Default black
•
Stochastic RSI 25% Color: Default red
•
Stochastic RSI 50% Color: Default orange
•
Stochastic RSI 75% Color: Default yellow
•
Stochastic RSI 100% Color: Default green
Stoch RSI Values Group
Adjust the value points that correspond to each color:
•
Value for 0% Color: Default 0.0
•
Value for 25% Color: Default 25.0
•
Value for 50% Color: Default 50.0
•
Value for 75% Color: Default 75.0
•
Value for 100% Color: Default 100.0
Stoch RSI Parameters Group
Fine-tune the Stochastic RSI calculation:
•
Stochastic Length: Default 14 (period for Stochastic calculation)
•
RSI Length: Default 14 (period for RSI calculation)
•
Stochastic %K: Default 3 (smoothing for %K line)
•
Stochastic %D: Default 3 (smoothing for %D line)
Trading Interpretation
Momentum Analysis
Strong Bullish Momentum: Multiple dots showing green/yellow colors across timeframes
Strong Bearish Momentum: Multiple dots showing black/red colors across timeframes
Mixed Signals: Dots showing different colors across timeframes (proceed with caution)
Entry Signals
Potential Long Entry:
•
Lower timeframes (1m, 3m, 5m) showing black/red (oversold)
•
Higher timeframes (1h, 4h, 1D) showing neutral to bullish colors
•
Look for reversal confirmation on price action
Potential Short Entry:
•
Lower timeframes showing green/yellow (overbought)
•
Higher timeframes showing neutral to bearish colors
•
Look for reversal confirmation on price action
Timeframe Confluence
High Probability Setups: When multiple timeframes align in the same direction
Divergence Opportunities: When short-term and long-term timeframes show opposite conditions
Best Practices
1. Multi-Timeframe Analysis
•
Use the indicator to identify alignment across different timeframes
•
Higher timeframes provide trend direction
•
Lower timeframes provide entry timing
2. Confirmation Required
•
Never trade based solely on the dots
•
Always confirm with price action, support/resistance levels, and other indicators
•
Look for confluence with volume and market structure
3. Risk Management
•
Set appropriate stop losses
•
Consider position sizing based on timeframe alignment
•
Be cautious when timeframes show conflicting signals
4. Market Conditions
•
The indicator works best in trending markets
•
Be cautious during low volatility or sideways markets
•
Adjust parameters for different market conditions if needed
Customization Tips
Color Schemes
•
Conservative Traders: Use more distinct colors with wider value ranges
•
Aggressive Traders: Use tighter value ranges for more sensitive signals
•
Dark Theme Users: Ensure colors are visible against dark backgrounds
Value Adjustments
•
Volatile Markets: Consider adjusting the 25% and 75% levels to 20% and 80%
•
Stable Markets: Consider tighter ranges like 30% and 70%
Parameter Tuning
•
Faster Signals: Reduce RSI Length and Stochastic Length
•
Smoother Signals: Increase smoothing parameters (%K and %D)
Troubleshooting
Common Issues
Dots Not Appearing:
•
Ensure the indicator is added to the chart
•
Check that the chart timeframe allows for the requested timeframes
Incorrect Colors:
•
Verify color settings in the indicator configuration
•
Ensure value ranges are properly set (0-100)
Missing Values:
•
Some timeframes may not have enough data on certain symbols
•
Gray dots indicate unavailable data (na values)
Performance Optimization
•
The indicator uses request.security() which may cause slight delays
•
Performance is optimized for real-time trading
•
Historical data may take a moment to fully load
Advanced Usage
Scalping Strategy
Focus on 1m, 3m, and 5m dots for quick entries with 15m confirmation
Swing Trading Strategy
Use 1h, 4h, and 1D dots for trend direction with lower timeframes for entry timing
Position Trading Strategy
Primarily focus on 4h and 1D dots with other timeframes for fine-tuning entries
Disclaimer
This indicator is a technical analysis tool and should not be used as the sole basis for trading decisions. Always combine with proper risk management, fundamental analysis, and other technical indicators. Past performance does not guarantee future results.
Support and Updates
For questions, suggestions, or issues with the indicator, please refer to the Pine Script code comments or consult TradingView's Pine Script documentation for advanced customizations.

Signalgo HF TP/SLThis script provides an original, systematic approach to high-frequency (HF) trade management by integrating multi-timeframe signal confirmation with dynamic, auto-calculated take-profit (TP) and stop-loss (SL) levels. Unlike standard TP/SL scripts, this tool generates actionable trade entries only when buy or sell signals align across multiple timeframes, then automatically plots three adaptive TP levels and a context-sensitive SL for each trade.

Step Channel Momentum Trend [ChartPrime]OVERVIEW
Step Channel Momentum Trend is a momentum-based price filtering system that adapts to market structure using pivot levels and ATR volatility. It builds a dynamic channel around a stepwise midline derived from swing highs and lows. The system colors price candles based on whether price remains inside this channel (low momentum) or breaks out (strong directional flow). This allows traders to clearly distinguish ranging conditions from trending ones and take action accordingly.
⯁ STRUCTURAL MIDLNE (STEP CHANNEL CORE)
The midline acts as the backbone of the trend system and is based on structure rather than smoothing.
Calculated as the average of the most recent confirmed Pivot High and Pivot Low.
The result is a step-like horizontal line that only updates when new pivot points are confirmed.
This design avoids lag and makes the line "snap" to recent structural shifts.
It reflects the equilibrium level between recent bullish and bearish control.
snapshot
This unique step logic creates clear regime shifts and prevents noise from distorting trend interpretation.
⯁ DYNAMIC VOLATILITY BANDS (ATR FILTERING)
To detect momentum strength, the script constructs upper and lower bands using the ATR (Average True Range):
The distance from the midline is determined by ATR × multiplier (default: 200-period ATR × 0.6).
These bands adjust dynamically to volatility, expanding in high-ATR environments and contracting in calm markets.
The area between upper and lower bands represents a neutral or ranging market state.
Breakouts outside the bands are treated as significant momentum shifts.
snapshot
This filtering approach ensures that only meaningful breakouts are visually emphasized — not every candle fluctuation.
⯁ MOMENTUM-BASED CANDLE COLORING
The system visually transforms price candles into momentum indicators:
When price (hl2) is above the upper band, candles are green → bullish momentum.
snapshot
When price is below the lower band, candles are red → bearish momentum.
snapshot
When price is between the bands, candles are orange → low or no momentum (range).
snapshot
The candle body, wick, and border are all colored uniformly for visual clarity.
This gives traders instant feedback on when momentum is expanding or fading — ideal for breakout, pullback, or trend-following strategies.
⯁ PIVOT-BASED SWING ANCHORS
Each confirmed pivot is plotted as a label ⬥ directly on the chart:
snapshot
They also serve as potential manual entry zones, SL/TP anchors, or confirmation points.
⯁ MOMENTUM STATE LABEL
To reinforce the current market mode, a live label is displayed at the most recent candle:
Displays either:
“Momentum Up” when price breaks above the upper band.
snapshot
“Momentum Down” when price breaks below the lower band.
snapshot
“Range” when price remains between the bands.
snapshot
Label color matches the candle color for quick identification.
Automatically updates on each bar close.
This helps discretionary traders filter trades based on market phase.
USAGE
Use the green/red zones to enter with momentum and ride trending moves.
Use the orange zone to stay out or fade ranges.
The step midline can act as a breakout base, pullback anchor, or bias reference.
Combine with other indicators (e.g., order blocks, divergences, or volume) to build high-confluence systems.
CONCLUSION
Step Channel Momentum Trend gives traders a clean, adaptive framework for identifying trend direction, volatility-based breakouts, and ranging environments — all from structural logic and ATR responsiveness. Its stepwise midline provides clarity, while its dynamic color-coded candles make momentum shifts impossible to miss. Whether you’re scalping intraday momentum or managing swing entries, this tool helps you trade with the market’s rhythm — not against it.

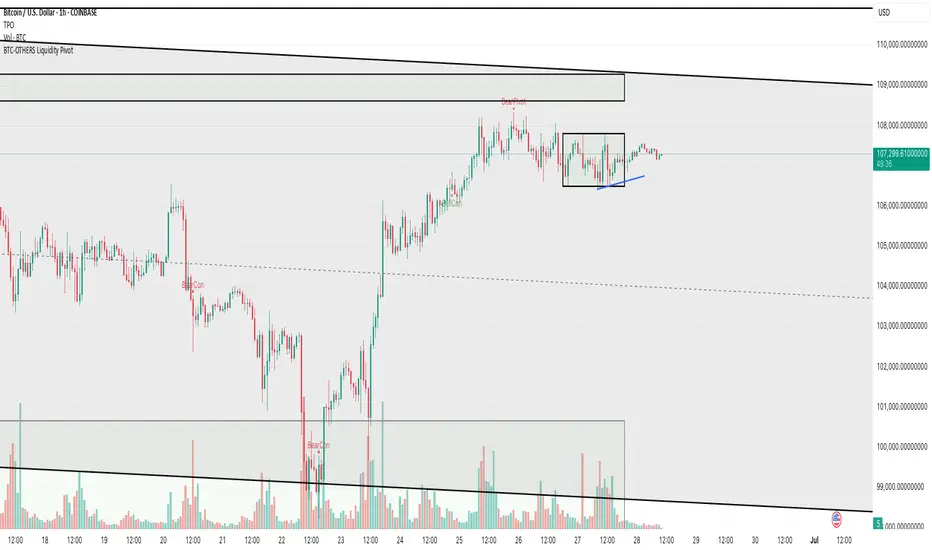
BTC-OTHERS Liquidity PivotBTC-OTHERS Liquidity Map – 1-hour Multi-Asset Pivot Scanner
WHAT IT DOES
This script tracks liquidity shifts between Bitcoin (BTC) and the broader alt-coin market (the OTHERS market-cap index that excludes the top-10 coins). It labels every confirmed 1-hour swing high or low on both assets, then flags four states:
BearPivot – BTC prints a new swing High while OTHERS does not; liquidity crowds into BTC and alts are weak.
BullPivot – BTC prints a swing Low and OTHERS forms a Higher Low; fresh liquidity starts flowing into stronger alts.
BearCon – BTC prints a swing Low and OTHERS forms a Lower Low; down-trend continuation.
BullCon – No new BTC Low while OTHERS makes a Higher High; up-trend continuation.
Signals appear on the actual pivot bar (offset back by the look-back length), so they never repaint after confirmation.
HOW THE PIVOTS ARE FOUND
• Symmetrical window: “Pivot Len” bars to the left and right (default 21).
• Full confirmation on both sides delivers stable, non-repainting pivots at the cost of about Pivot Len bars’ delay.
• Labels are offset –Pivot Len so they sit on the genuine extreme.
INPUTS
Symbols: BTC symbol and an OTHERS symbol so you can switch exchanges or choose another alt index.
Pivot Len: tighten for faster but noisier signals; widen for cleaner pivots.
Style: customise shape and text colours.
PLOTS AND ALERTS
Four labelled shapes (BearPivot, BullPivot, BearCon, BullCon) plot above or below price. Each label is linked to an alertcondition, so you can create one-click alerts and stay informed without watching the screen.
TYPICAL WORKFLOW
1. Attach the script to any 1-hour BTC chart (or leave the script’s timeframe empty to follow your current chart TF).
2. Turn on alerts to receive push/email notifications.
3. Use the labels as a liquidity compass, combining them with volume, funding or your own strategy for actual entries and exits.
Enjoy and trade safe.
CCI-coded OBV Detector BetaVersion 0.1 [FelixHsu]Using CCI‐coded OBV to detect major price bottoms and tops over a given time period.

Supertrend Multi-Timeframe v6 IMPORTANT WORDS!IMPORTANT WORDS!IMPORTANT WORDS!IMPORTANT WORDS!IMPORTANT WORDS!IMPORTANT WORDS!IMPORTANT WORDS!IMPORTANT WORDS!IMPORTANT WORDS!IMPORTANT WORDS!IMPORTANT WORDS!IMPORTANT WORDS! look theres totally an awesome description here, its super informative too!

AI Smart Liquidity Signal 🚀🚀 AI Smart Liquidity Signal
🔐 إشارات تداول ذكية مبنية على اختراقات السيولة الحقيقية + فلاتر دقيقة تؤكد الإشارات بفعالية.
✅ فلترة الاتجاه العام + الاتجاه الذكي
✅ تأكيد عبر RSI و MACD
✅ مناطق دعم ومقاومة ديناميكية ومتعددة الفريمات
✅ أهداف Take Profit و Stop Loss محسوبة تلقائيًا عبر ATR
⛔️ بدون إعادة رسم – إشارات موثوقة ومجربة
🔎 نسبة دقة تفوق 95% على البيانات التاريخية
💬 للحصول على صلاحية الاستخدام أو الدعم:
@AISmartliquiditySignalBot
––––––––––––––––––––––––––––––––––––––––––––––––––
🚀 AI Smart Liquidity Signal
🔐 Real-time smart signals based on true liquidity breakouts with advanced filters.
✅ General + Smart Trend filters
✅ RSI & MACD confirmation
✅ Dynamic and Multi-Timeframe Support/Resistance
✅ Auto-calculated Take Profit & Stop Loss via ATR
⛔️ No repaint – trusted & verified signals
🔎 Historical accuracy above 95%
💬 For access or support:
@AISmartliquiditySignalBot
––––––––––––––––––––––––––––––––––––––––––––––––––
📌 ملاحظة / Disclaimer:
هذا المؤشر مخصص لأغراض تعليمية ولا يُعد نصيحة مالية. التداول على مسؤوليتك الخاصة.
This script is for educational purposes only and does not constitute financial advice. Trade at your own risk.

OPR Asia-New-York [Elykia]This Pine Script indicator, called "OPR Asia-New-York ", displays time-based boxes corresponding to two specific trading periods known as OPR (Opening Price Range):
🎯 Purpose of the Indicator:
To visualize two key market time windows (morning and afternoon) as extended boxes, helping with technical analysis around opening ranges.
🕒 Two sessions displayed as boxes:
🔹 Morning OPR:
Default: from 09:00 to 09:15 (configurable)
The box extends until 10:30.
It captures the highest and lowest candle within this interval.
🔸 Afternoon OPR:
Default: from 15:30 to 15:45
The box extends until 17:30.
Follows the same logic as the morning session.
⚙️ Dashboard Options:
Enable or disable the morning or afternoon box individually
Select the timezone (e.g., GMT+2)
Customize all colors (morning/afternoon boxes, median line)
Set your own start/end/extension times for each session
📦 Each box includes:
A colored rectangle showing the price range (high/low)
A dotted median line between the high and low
The box and line extend until the end time defined
🧠 Usefulness for Traders:
Identify liquidity zones or consolidation areas
Trade setups like liquidity grabs, breakouts, or fakeouts around the OPR
Align with ICT methods or scalping strategies based on session behavior

ALP AT + KAMA Crossover This indicator is a powerful combination of two adaptive trend-following concepts: the AlphaTrend by Kivanc Ozbilgic and the Kaufman's Adaptive Moving Average (KAMA), often credited to Perry Kaufman (with the specific implementation based on HPotter's interpretation of KAMA).
The primary goal of this indicator is to provide a robust trend detection and dynamic support/resistance system, adapting to market volatility.
How it Works:
AlphaTrend Component: The green/red line is the AlphaTrend. It dynamically adjusts to market volatility (using ATR) and momentum (using MFI or RSI, configurable). It provides faster signals for trend changes.
KAMA Component: The black line is the Kaufman's Adaptive Moving Average. KAMA is designed to filter out market noise during choppy periods and follow the price closely during trending periods, making it a smoother and more reliable long-term trend indicator.
Color-Coded Trend Zones: The AlphaTrend line is color-coded to visually represent the current market condition based on the price's position relative to both AlphaTrend and KAMA:
Strong Uptrend (Lime Green): Price is above both AlphaTrend and KAMA.
Strong Downtrend (Red): Price is below both AlphaTrend and KAMA.
Uptrend Uncertainty (Orange): Price is above KAMA but below AlphaTrend (suggests consolidation or weakening uptrend).
Downtrend Uncertainty (Blue): Price is below KAMA but above AlphaTrend (suggests consolidation or strengthening downtrend within a downtrend).
Gray: Default/unclassified state.
The underlying logic is based on:
Bullish Crossover (Potential Buy Signal): When the AlphaTrend line crosses above the KAMA line.
Bearish Crossover (Potential Sell Signal): When the AlphaTrend line crosses below the KAMA line.
These crossovers indicate a shift in the adaptive trend momentum.
Customization:
Users can customize various parameters in the indicator's settings, including:
AlphaTrend Multiplier and Common Period.
KAMA Lengths and Alpha values.
All the color codes for different trend zones and lines, allowing for full personalization of the visual output.
Disclaimer:
This indicator is for informational and educational purposes only and should not be considered as financial advice. Trading involves substantial risk, and past performance is not indicative of future results. Always conduct your own thorough research and analysis before making any trading or investment decisions. This indicator is NOT a buy/sell/hold recommendation. Use it as a tool to aid your analysis, not as a sole basis for your trades.
